
WhatsApp (Cloud API)
Get started
Use Voiceflow Dialog Manager API to run a Whatsapp assistant
Before you start
- Clone project from Github
- Whatsapp Cloud API
- Install ngrok, more details here: https://ngrok.com/download
- Voiceflow Chat Assistant project
Create an app on Facebook Developers portal
Follow the Get started guide here to create your app and get your WhatsApp token:
https://developers.facebook.com/docs/whatsapp/cloud-api/get-started
The App
Once registered as a dev, go to https://developers.facebook.com/apps/
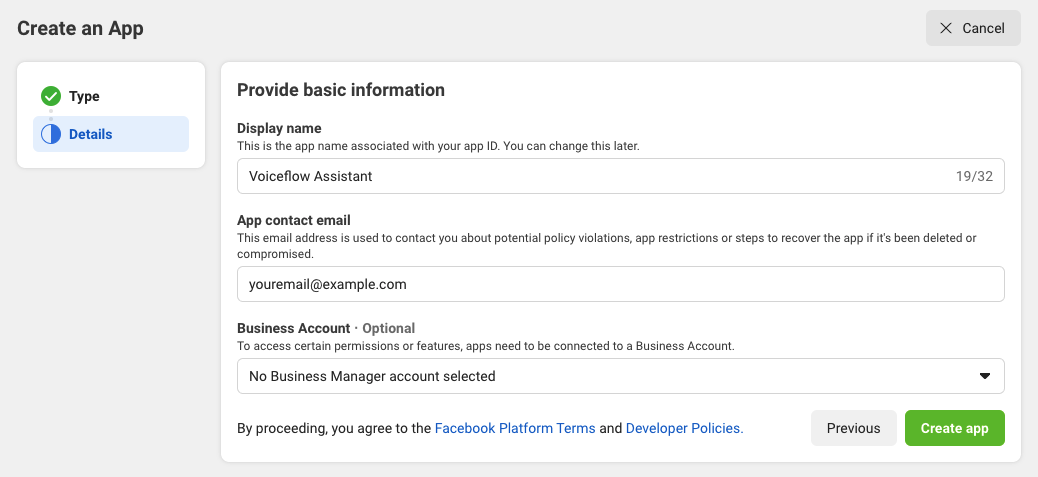
Create a new app by clicking on Create App.
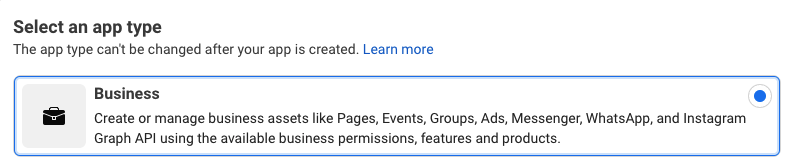
Select "Business" for app type and click Next.
Fill the needed info for the app creation and click Create app:
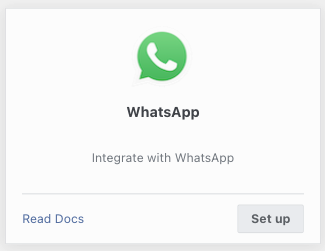
On the next page, scroll down to the WhatsApp integration and click on Set up:
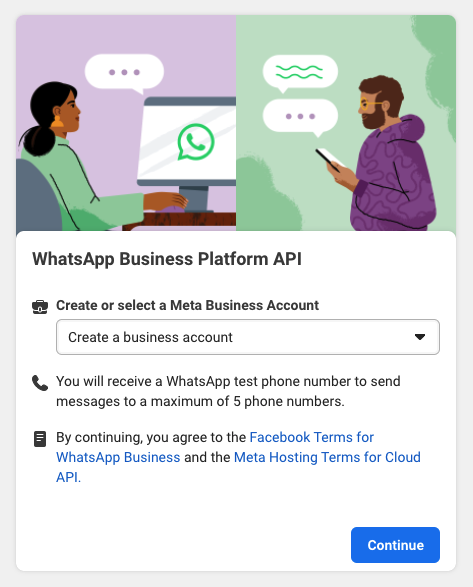
Create a Business account (or select an existing one)
Link an existing number or create a new one:
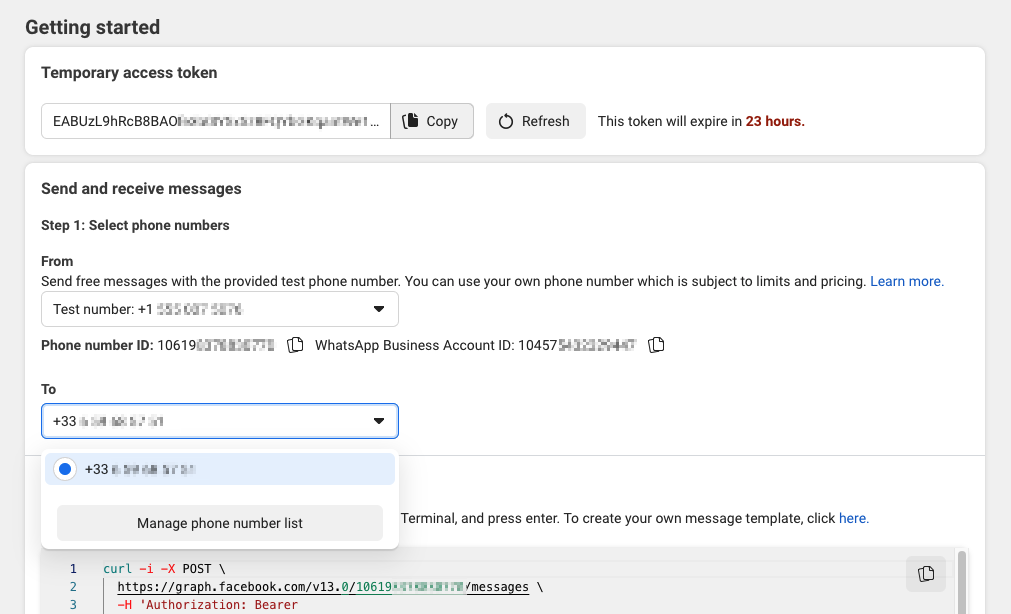
You can add your phone number by clicking on Manage phone number list.
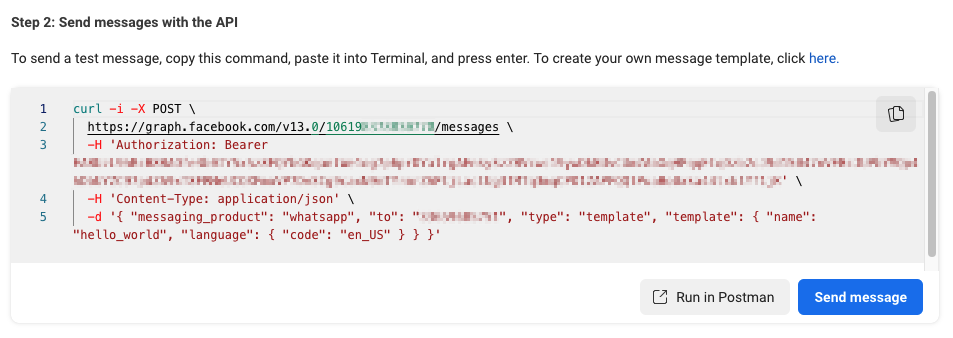
Now that you are ready to do a test, simply click on the Send message button.
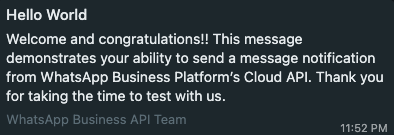
You should get something like this in your WhatsApp app:
Last step here, you want to go to the top of the page and click on Refresh then Copy to copy your token.

Save it as we will need it in the new step.
Webhook
Before going further, let's start populating our .env file with our token.
In the root of the app directory, create the .env file.
We are going to populate this file with the needed info for the WhatsApp webhook as well as the Voiceflow project.
WHATSAPP_TOKEN = 'EAAQlqaPy54MBAGqxxxxxxxx'
VERIFY_TOKEN = 'voiceflow'
VF_PROJECT_API = ''
VF_PROJECT_VERSION = 'production'
PORT = '3000'
For now, you can paste the token for the WHATSAPP_TOKEN variable, you can use anything for the VERIFY_TOKEN or leave it to 'voiceflow'.
Regarding the port, you can put the value you want, by default the app will use 3000.
For the VF_ variables, we will see that a bit later.
Back on our Getting Started Facebook Developer page, click on the Configure webhooks link in Step 3:

On this new page, click on Edit:
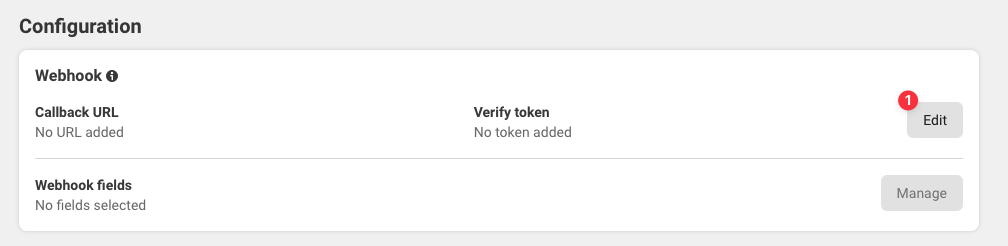
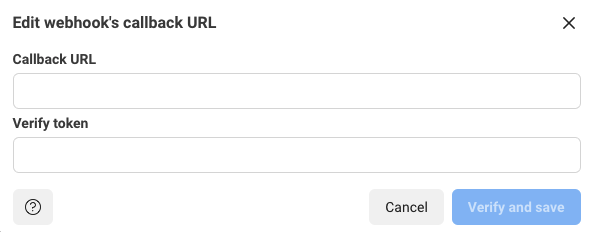
This is where you will need to set your webhook's callback URL and your Verify token:
For the Verify token, put what you've set in your .env file (voiceflow by default).
For the Callback URL, we will need to start the app.
From the root of the directory, start the app with npm start.
And if everything work as expected, you should have something similar to this:
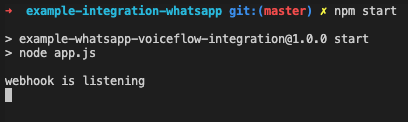
We are listening, let's use ngrok to open this to the world.
In a new terminal, type ngrok http 3000.
Replace 3000 with the PORT number you want to use.
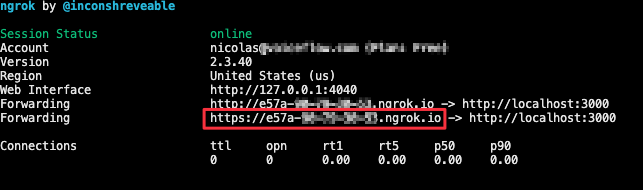
Here, the URL you want to copy is the secure one (starting with https).
Almost there, go back to your Config page, paste this URL and add the /webhook path to it
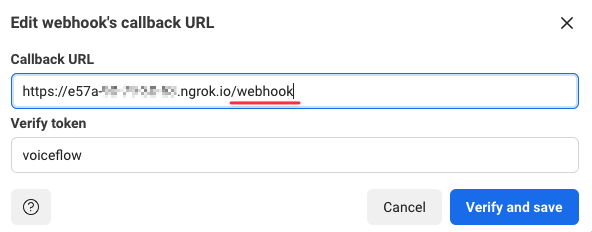
And click on Verify and save.
The previous window should close and your webhook set up.
On your terminal, you should see this message: WEBHOOK_VERIFIED
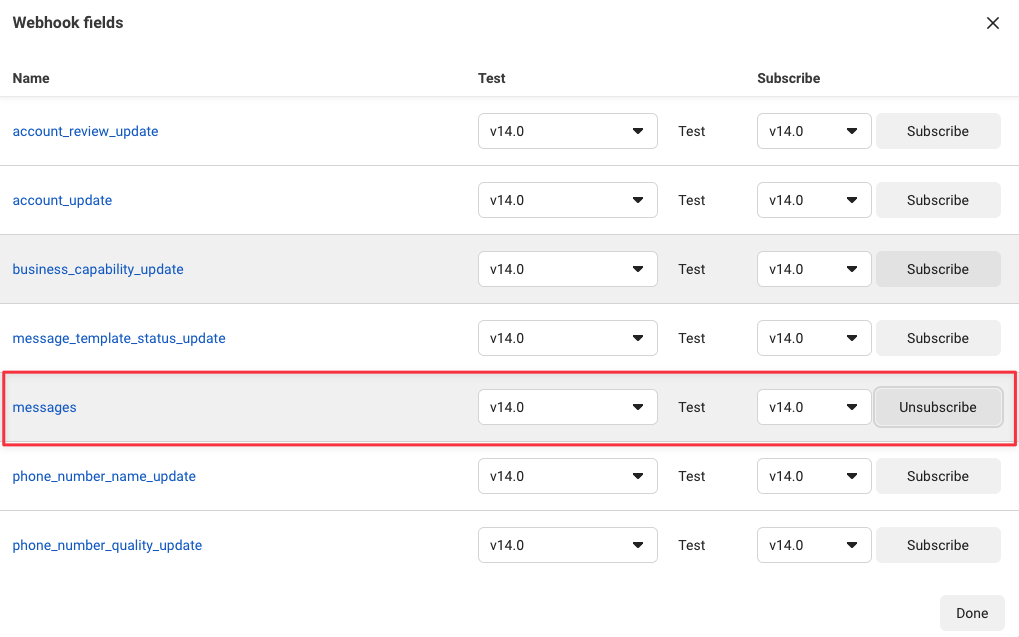
Last step, we want to choose what to receive, and to do so, we need to subscribe to the message event.
Click on Manage and, on the new window, subscribe to messages:

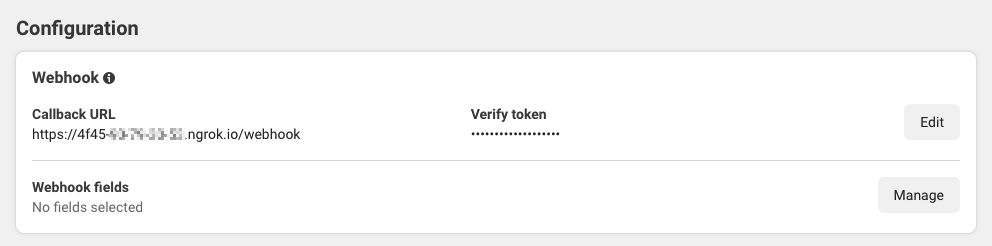
You should have a config similar to this one:
Voiceflow Project
So, the webhook is setup, our app is running waiting to get some messages and send them to our Dialog Manager API running your Voiceflow Chat project.
To use the Dialog Manager API with your project, we will need the project API key and, to test it in an easy way, we will create and use the 'production' version.
In Voiceflow Creator, open a Chat project and go to the Integrations:
On the Integrations page, you want to copy the API key
Now, paste it in your .env file for the VF_PROJECT_API variable:
VF_PROJECT_API='VF.DM.62xxxxxxxxxxxxxxxxxxxxxxx
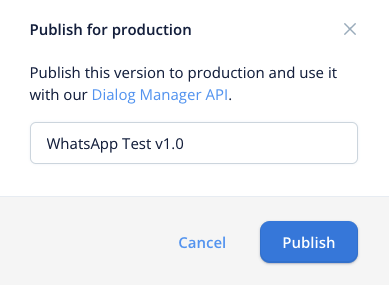
Back on Voiceflow Creator, go to the Designer view and click on the Publish button:

Set a name (optional) for this version and click on Publish to publish this version as the production one:
Testing
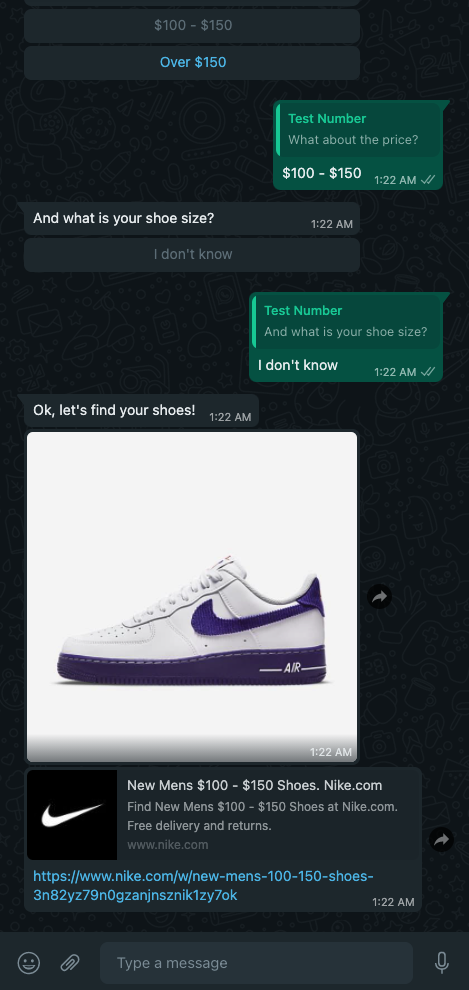
Congratulations, you are ready to test your Voiceflow project using WhatsApp!
Close your app with Ctrl+C (but keep ngrok running in the other terminal) and launch it again with npm start so it will use the updated values from the .env file.
That's it, start interacting on WhatsApp with your Voiceflow project.
Documentation
Cloud API: https://developers.facebook.com/docs/whatsapp/cloud-api
Voiceflow Dialog Manager API: https://developer.voiceflow.com/reference
Project Versioning in Voiceflow: https://www.voiceflow.com/docs/documentation-project-versioning
Updated 5 months ago