
Custom Widgets & Effects (beta)
Render custom widgets like file upload, date pickers, and more!
Overview
The new extensions feature allows you to render custom responses and effects inside of your Voiceflow Web Chat.
There are two types of extensions:
Response: These are extensions that render a custom widget inside the Voiceflow Web Chat. This includes examples like:
- File Upload
- Calendar Picker
- Payment Modal
Effects These are extensions that don't render a widget, you may use these to change a status icon on your page, deep link someone within your app, or trigger a custom piece of code.
How it works
Find the examples repo here
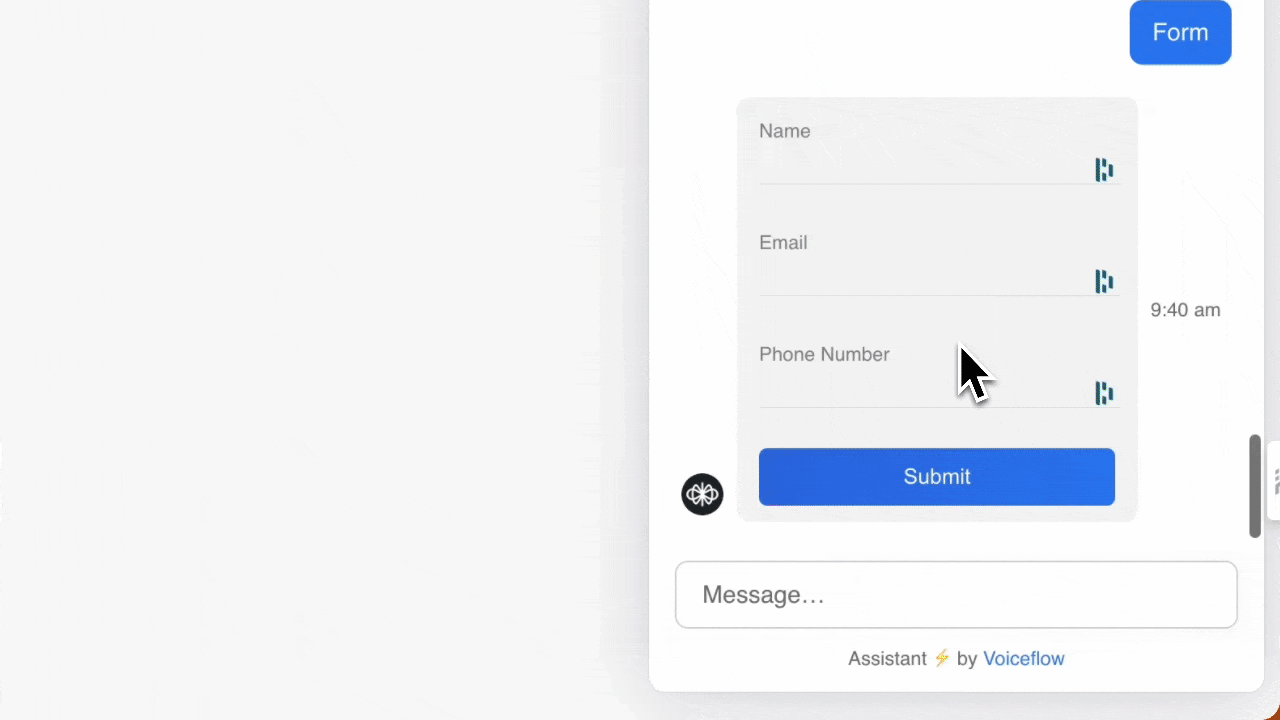
Extensions allows you to use the custom action step or a function in your Voiceflow design to trigger a piece of custom code (the extension) in the code of your website. An example of a form is shown below.
An extension follows the pattern below
Response Extension
interface ResponseExtension {
	name: string,
	type: "response",
	match: (args: { trace: Trace }) => boolean,
	render?: (args: { trace: Trace, element: HTMLDivElement }) => (() => void) | void
}
Effects Extension
interface EffectExtension {
	name: string,
	type: "effect",
	match: (args: { trace: Trace }) => boolean,
	effect?: (args: { trace: Trace }) => Promise<void> | void
}
To activate these extensions you would include them in your Web Chat installation code in the following way.
window.voiceflow.chat.load({
	...config,
	assistant: {
		extensions: [extension1, extension2, extension3, ...etc]
	}
});
These extensions can be triggered in your design using the custom action step or a function.
Lets walk through an example of a simple form below.
Example 1: Custom Form
1. Create the Extension
An extension called Custom_Form is written. This extension contains a field for user name, email, and phone number. It also has a submit button.
const FormExtension = {
  name: 'Custom_Form', // Extension name
  type: 'response', // Extension type indicating it handles responses
  match: ({ trace }) => trace.payload.name === 'Custom_Form', // Condition for when this extension is triggered
  render: ({ trace, element }) => {
    // Function to render the form
    const formContainer = document.createElement('form'); // Create a form element dynamically

    // Set the inner HTML of the form, simplifying it to only include input fields and a submit button
    formContainer.innerHTML = `
      <label for="name">Name:</label>
      <input type="text" class="name" name="name"><br><br>
      <label for="email">Email:</label>
      <input type="email" class="email" name="email"><br><br>
      <label for="phone">Phone Number:</label>
      <input type="tel" class="phone" name="phone"><br><br>
      <input type="submit" class="submit" value="Submit">
    `;

    // Attach an event listener to the form for handling the submit event
    formContainer.addEventListener('submit', function(event) {
      event.preventDefault(); // Prevent default form submission behavior
      // Extract values from the form fields
      const name = formContainer.querySelector('.name').value;
      const email = formContainer.querySelector('.email').value;
      const phone = formContainer.querySelector('.phone').value;
      // Simplify the logic: Remove the submit button after submission without validation checks
      formContainer.querySelector('.submit').remove();
      // Programmatically submit the form data
      window.voiceflow.chat.interact({ type: 'complete', payload: { name, email, phone } });
    });

    element.appendChild(formContainer); // Append the form to the specified DOM element
  },
};
You can get the full sample of extensions here.
2. Modify the Chat Widget Installation Code
The Web Chat widget is modified to include the extenion Custom_Form
window.voiceflow.chat.load({
  verify: {
    projectID: "<ID>"
  },
  url: "https://general-runtime.voiceflow.com",
  versionID: "production",
	assistant: {
		extensions: [Custom_Form]
	}
});
There is no limit on the number of extensions you can add.
3. Trigger the Extension with a Custom Action
A custom action is added to the flow with the name Custom_Form. We have turned the 'stop on action' setting on. This means that when this step is reached, the extension will be triggered and the agent will wait for a response to be received before proceeding.
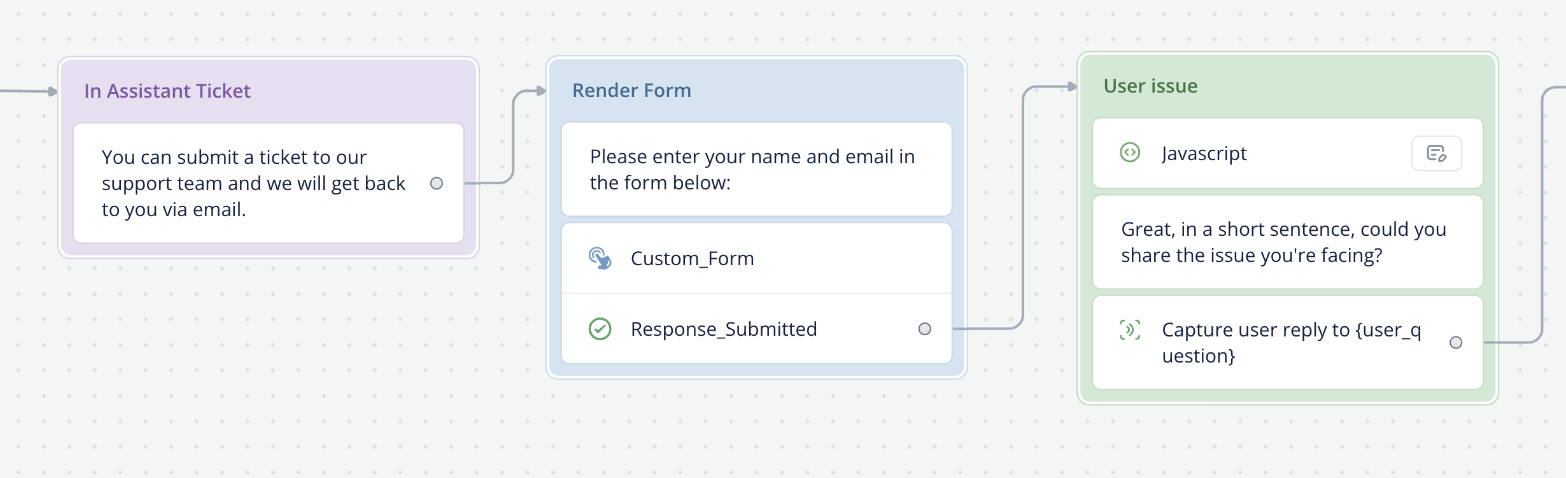
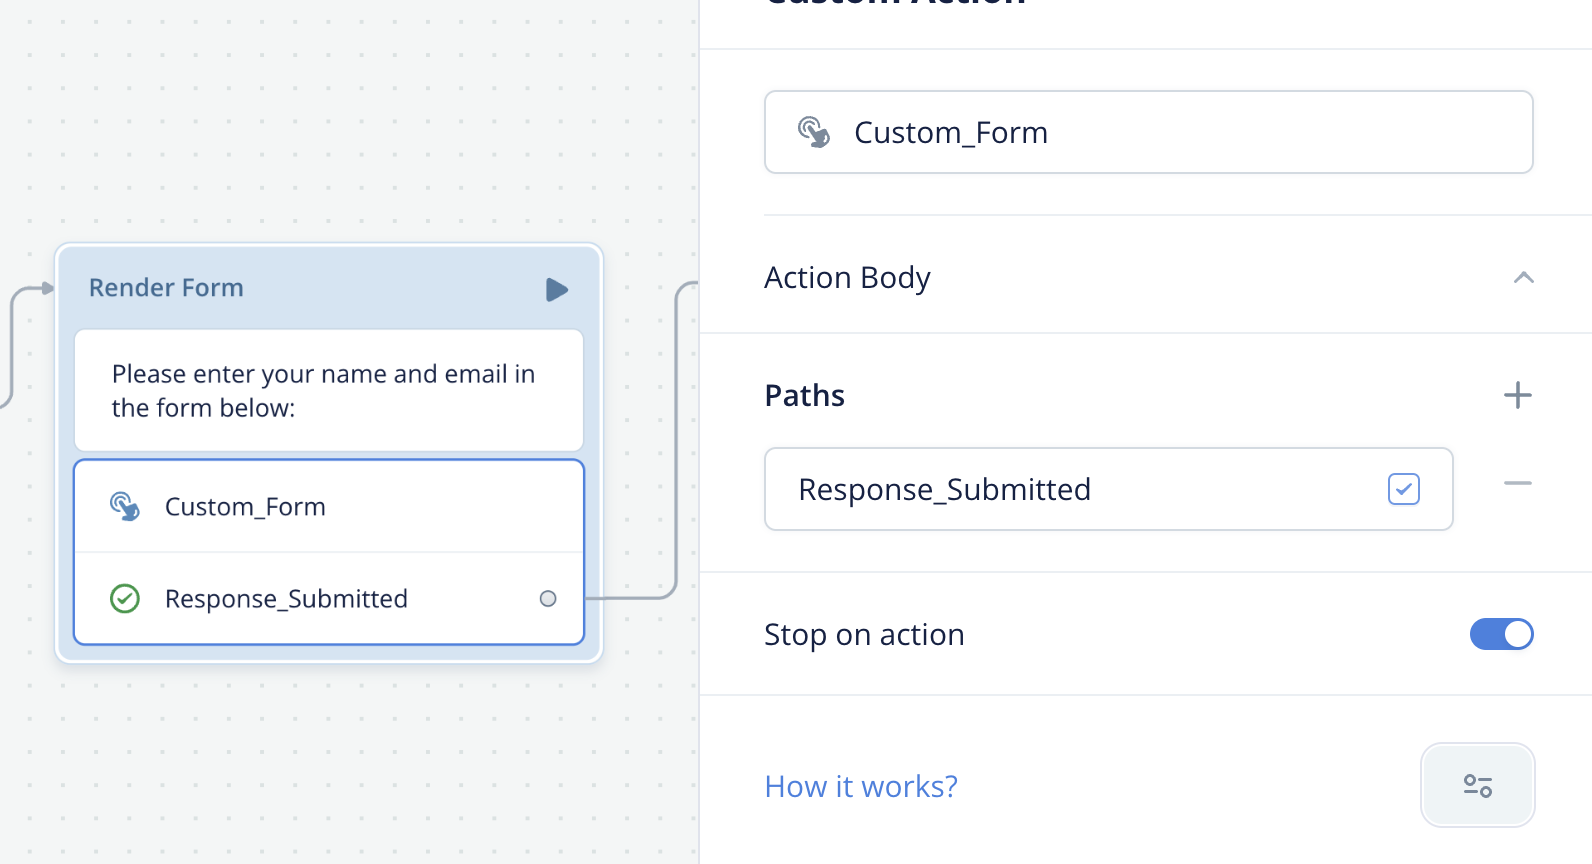
When a user reaches the custom action, it will send the following trace to the Web Chat. This is what triggers the extension to appear.
  {
    "type": "Custom_Form",
    "payload": "{ }",
    "defaultPath": 0,
    "paths": [
      { "event": { "type": "Response_Submitted" } }
    ]
  }
4. Retrieve the response
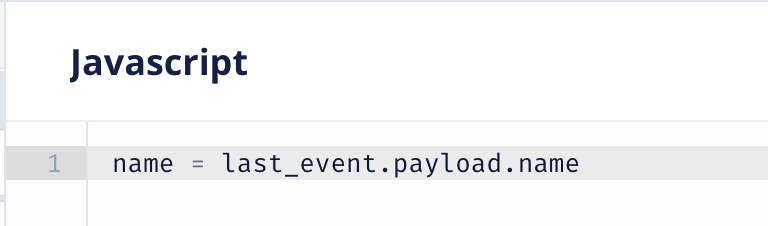
Responses from the custom action are saved in a variables called last_eventin Voiceflow. This can be accessed and parsed using the Javascript step. Example below
name = last_event.payload.name
Other Examples
For a number of other examples including file upload, forms, timers, date pickers, thumbs up/down and more please see the video and github repo below.
Updated 20 days ago