
Live Chat Handoff
Use our open source chat widget and custom action step to do a handoff to a live chat platform
Overview
Voiceflow's Web Chat can be used together with any API-enabled live agent platform to create a seamless handoff experience between your Voiceflow agent and a support agent.
Live Agent Platform Requirements
In order to integrate effectively, make sure your live agent platform has the following features:
- a documented API (or an SDK) that can be used to:
- create a new conversation with an agent.
- add a new user-sent message to an existing conversation.
- a mechanism (i.e. wehbooks, WebSocket, an SDK) for subscribing to changes to an existing conversation such as:
- when a new message has been added by an agent.
- [OPTIONAL] when the status of a conversation changes (agent assigned, conversation closed/ended)/
In this guide we will walk through how you could build a live chat handoff between Voiceflow and Intercom using the Voiceflow Chat UI Kit and a Custom Action step.
The solution outlined in this guide requires an intermediary server that will maintain a WebSocket connection with the Web Chat widget. It will also make authenticated requests to the live agent platform. In practice, these features can also be added to any existing server in your infrastructure.
What we will cover:
- What the user experience might look like.
- Overview of the example project's key components.
- What you need to get started.
- Configuration guidelines for Voiceflow, Intercom, and your clone of the demo-react-chat project.
Watch the following video tutorial for a walkthrough of the demo code:
User experience demo
When a customer reaches a point where a live agent's support is needed, you can automatically transition them from interacting with your Voiceflow agent to a live agent using Intercom.
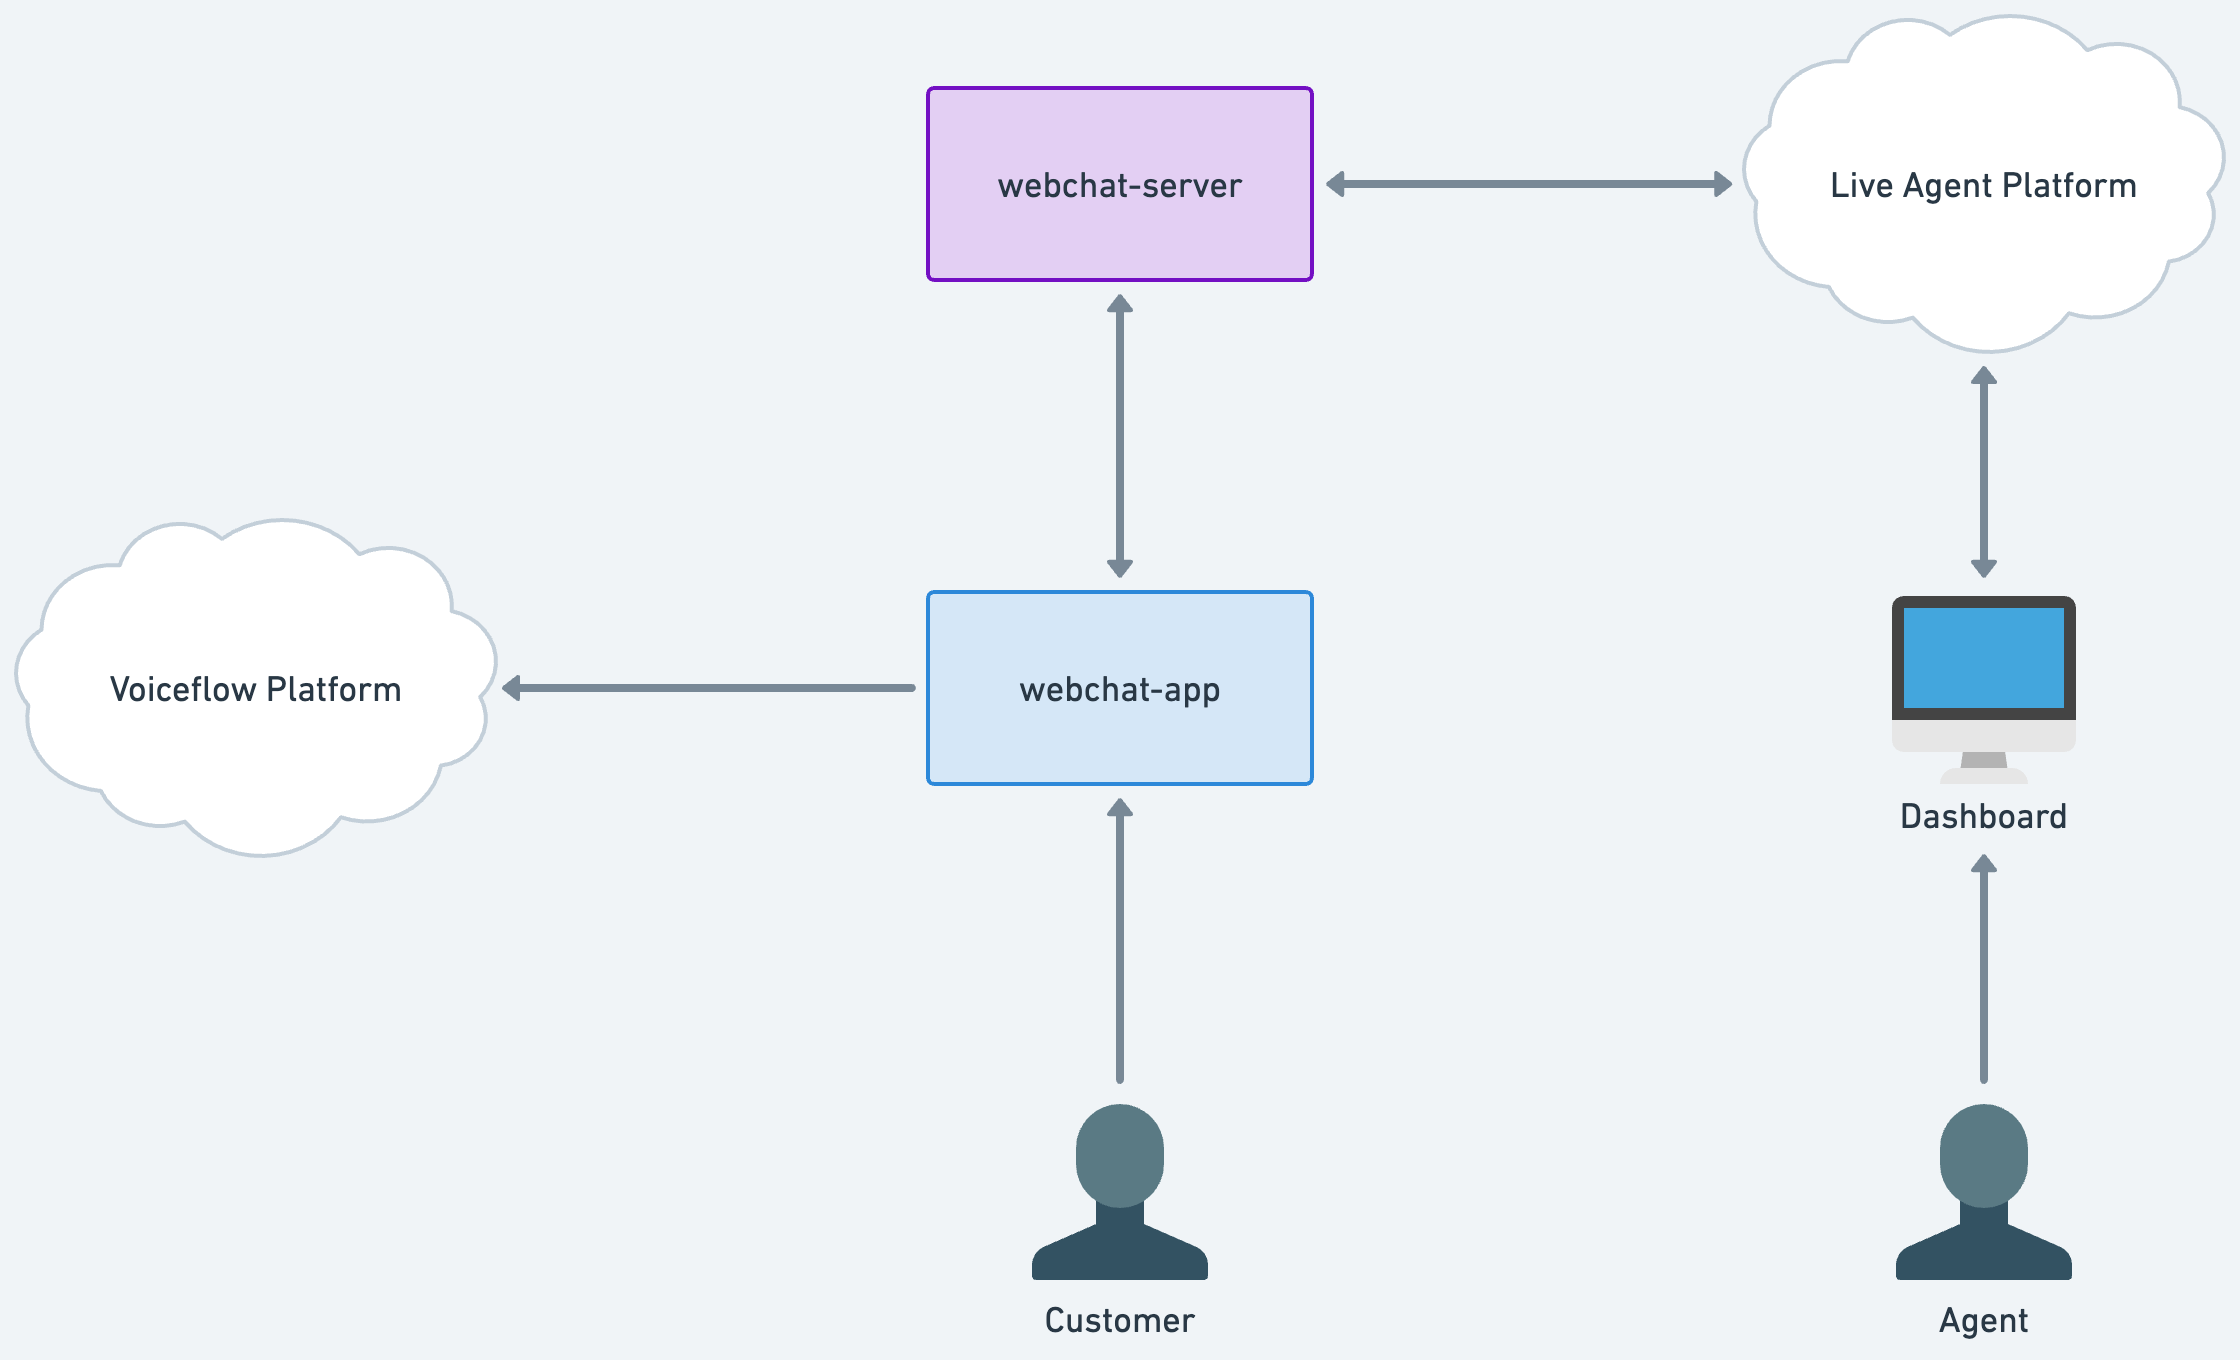
Key solution components
Following are key components of the example project's solution:
- @voiceflow/react-chat - a library available on
npmthat contains a ReactJS component library. This library can be used to build a custom Voiceflow Web Chat experience. These components can be viewed in our storybook at any time. - webchat-server - a simple NodeJS server that maintains a WebSocket connection with the front-end. The server makes requests to the target live agent platform.
- webchat-app - a simple ReactJS web app that contains our custom Voiceflow Web Chat with live agent integration.
What you need to get started
To follow along with this tutorial, you will need the following.
Voiceflow:
- A Voiceflow account and workspace.
- Voiceflow's demo-react-chat repository.
Intercom:
- An active Intercom account and workspace. (We recommend using a separate workspace for testing.)
- Intercom permissions to create an manage apps in the Intercom Developer Hub.
Configuration guidelines
demo-react-chat configuration
- Clone the demo-react-chat repository to your local machine.
- Follow the set-up steps in the main directory's README.
- Navigate to the server directory. (This directory contains a sample WebSocket server with some basic integrations.)
- Follow the set-up steps in the server directory README. See the next section for steps on how to obtain an Intercom app access token.
Voiceflow agent configuration
Import the example_project.vf file in the demo-react-chat repository to your Voiceflow workspace. You can find the escalation flow under the "FAQ" Topic.
Once the example project is imported:
- Open the project.
- Train your agent (the example project contains sample NLU training data).
- Click "Publish".
- Copy the project's Dialog Manager API Key.
The
talk_to_agentCustom Action's "Stop on action" toggle must remain enabled.When this Step is reached, the conversation with the agent will stop. This allows your custom app to initiate a conversation with the live chat platform.
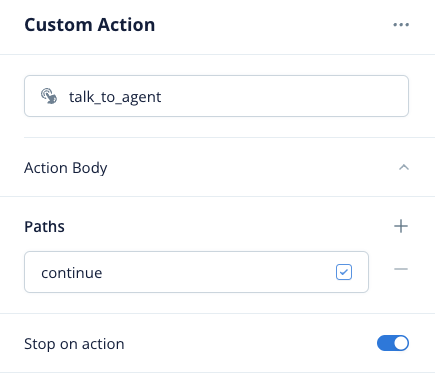
Custom Action step with "Stop on action" enabled.
Create an Intercom app and obtain an access token
We recommend using a test workspace in Intercom so that test conversations are separate from your active inboxes.
Logged in as an admin in your Intercom instance:
- Navigate to the Intercom Developer Hub.
- Create a new app.
- Copy the app's access token to your clipboard.
In your demo-react-chat project:
- Navigate to the .env file that you created under demo-react-chat/server in a previous step.
- Set the access token you copied from Intercom as the
INTERCOM_TOKENvalue.
Configure your test webhook
In your demo-react-chat project:
- Under demo-react-chat/server, use
yarn devto run your server. - Since we are testing this locally, create a secure tunnel with a tool like ngrok so that your local server can interact with your Intercom app (see this ngrok guide to learn more). Use port
9099. - Copy the secure tunnel's forwarding address (e.g.
https://demo.ngrok-free.app).
In your Intercom app's Webhooks tab:
- Paste the forwarding address into the Endpoint URL field appended with
/intercom/webhook(the full test Endpoint URL might look something likehttps://demo.ngrok-free.app/intercom/webhook). - Subscribe to the following Topics so that your app gets notified of key Intercom events:
conversation.admin.assignedconversation.admin.closedconversation.admin.replied
- Select "Send a test request" to confirm that your test webhook will receive events from Intercom as expected.
Please note that the demo-react-chat code is not production safe as-is. Learn more here.
Time to test
In your demo-react-chat project:
- Under the main demo-react-chat directory, run
yarn dev. Your demo app will be available locally athttp://127.0.0.1:3006.
In your browser with your demo app open:
- Click on the launch icon to open the Web Chat widget.
- Enter "talk to human" to trigger the escalation flow.
- Follow any prompts in the Web Chat widget.
In your Intercom test Workspace inbox:
- Assign yourself to the new conversation. A system message should appear in Web Chat indicating that an agent has been assigned.
- Send a few messages to ensure that user and agent inputs are sent back and forth between the systems.
- Close the Intercom conversation. A system message should appear in Web Chat indicating that the agent has closed the conversation and that you will be returned to the Voiceflow bot.
For a detailed walkthrough of the demo project code, watch our How to integrate Voiceflow with Intercom tutorial.
That's it! We are excited to see what you build from here! ![]()
Updated 5 months ago