
Step 1: Create Agent
Get an AI agent up and running in under 5 minutes.
Agents are the core of Voiceflow. Each agent is powered by the data you add to it.
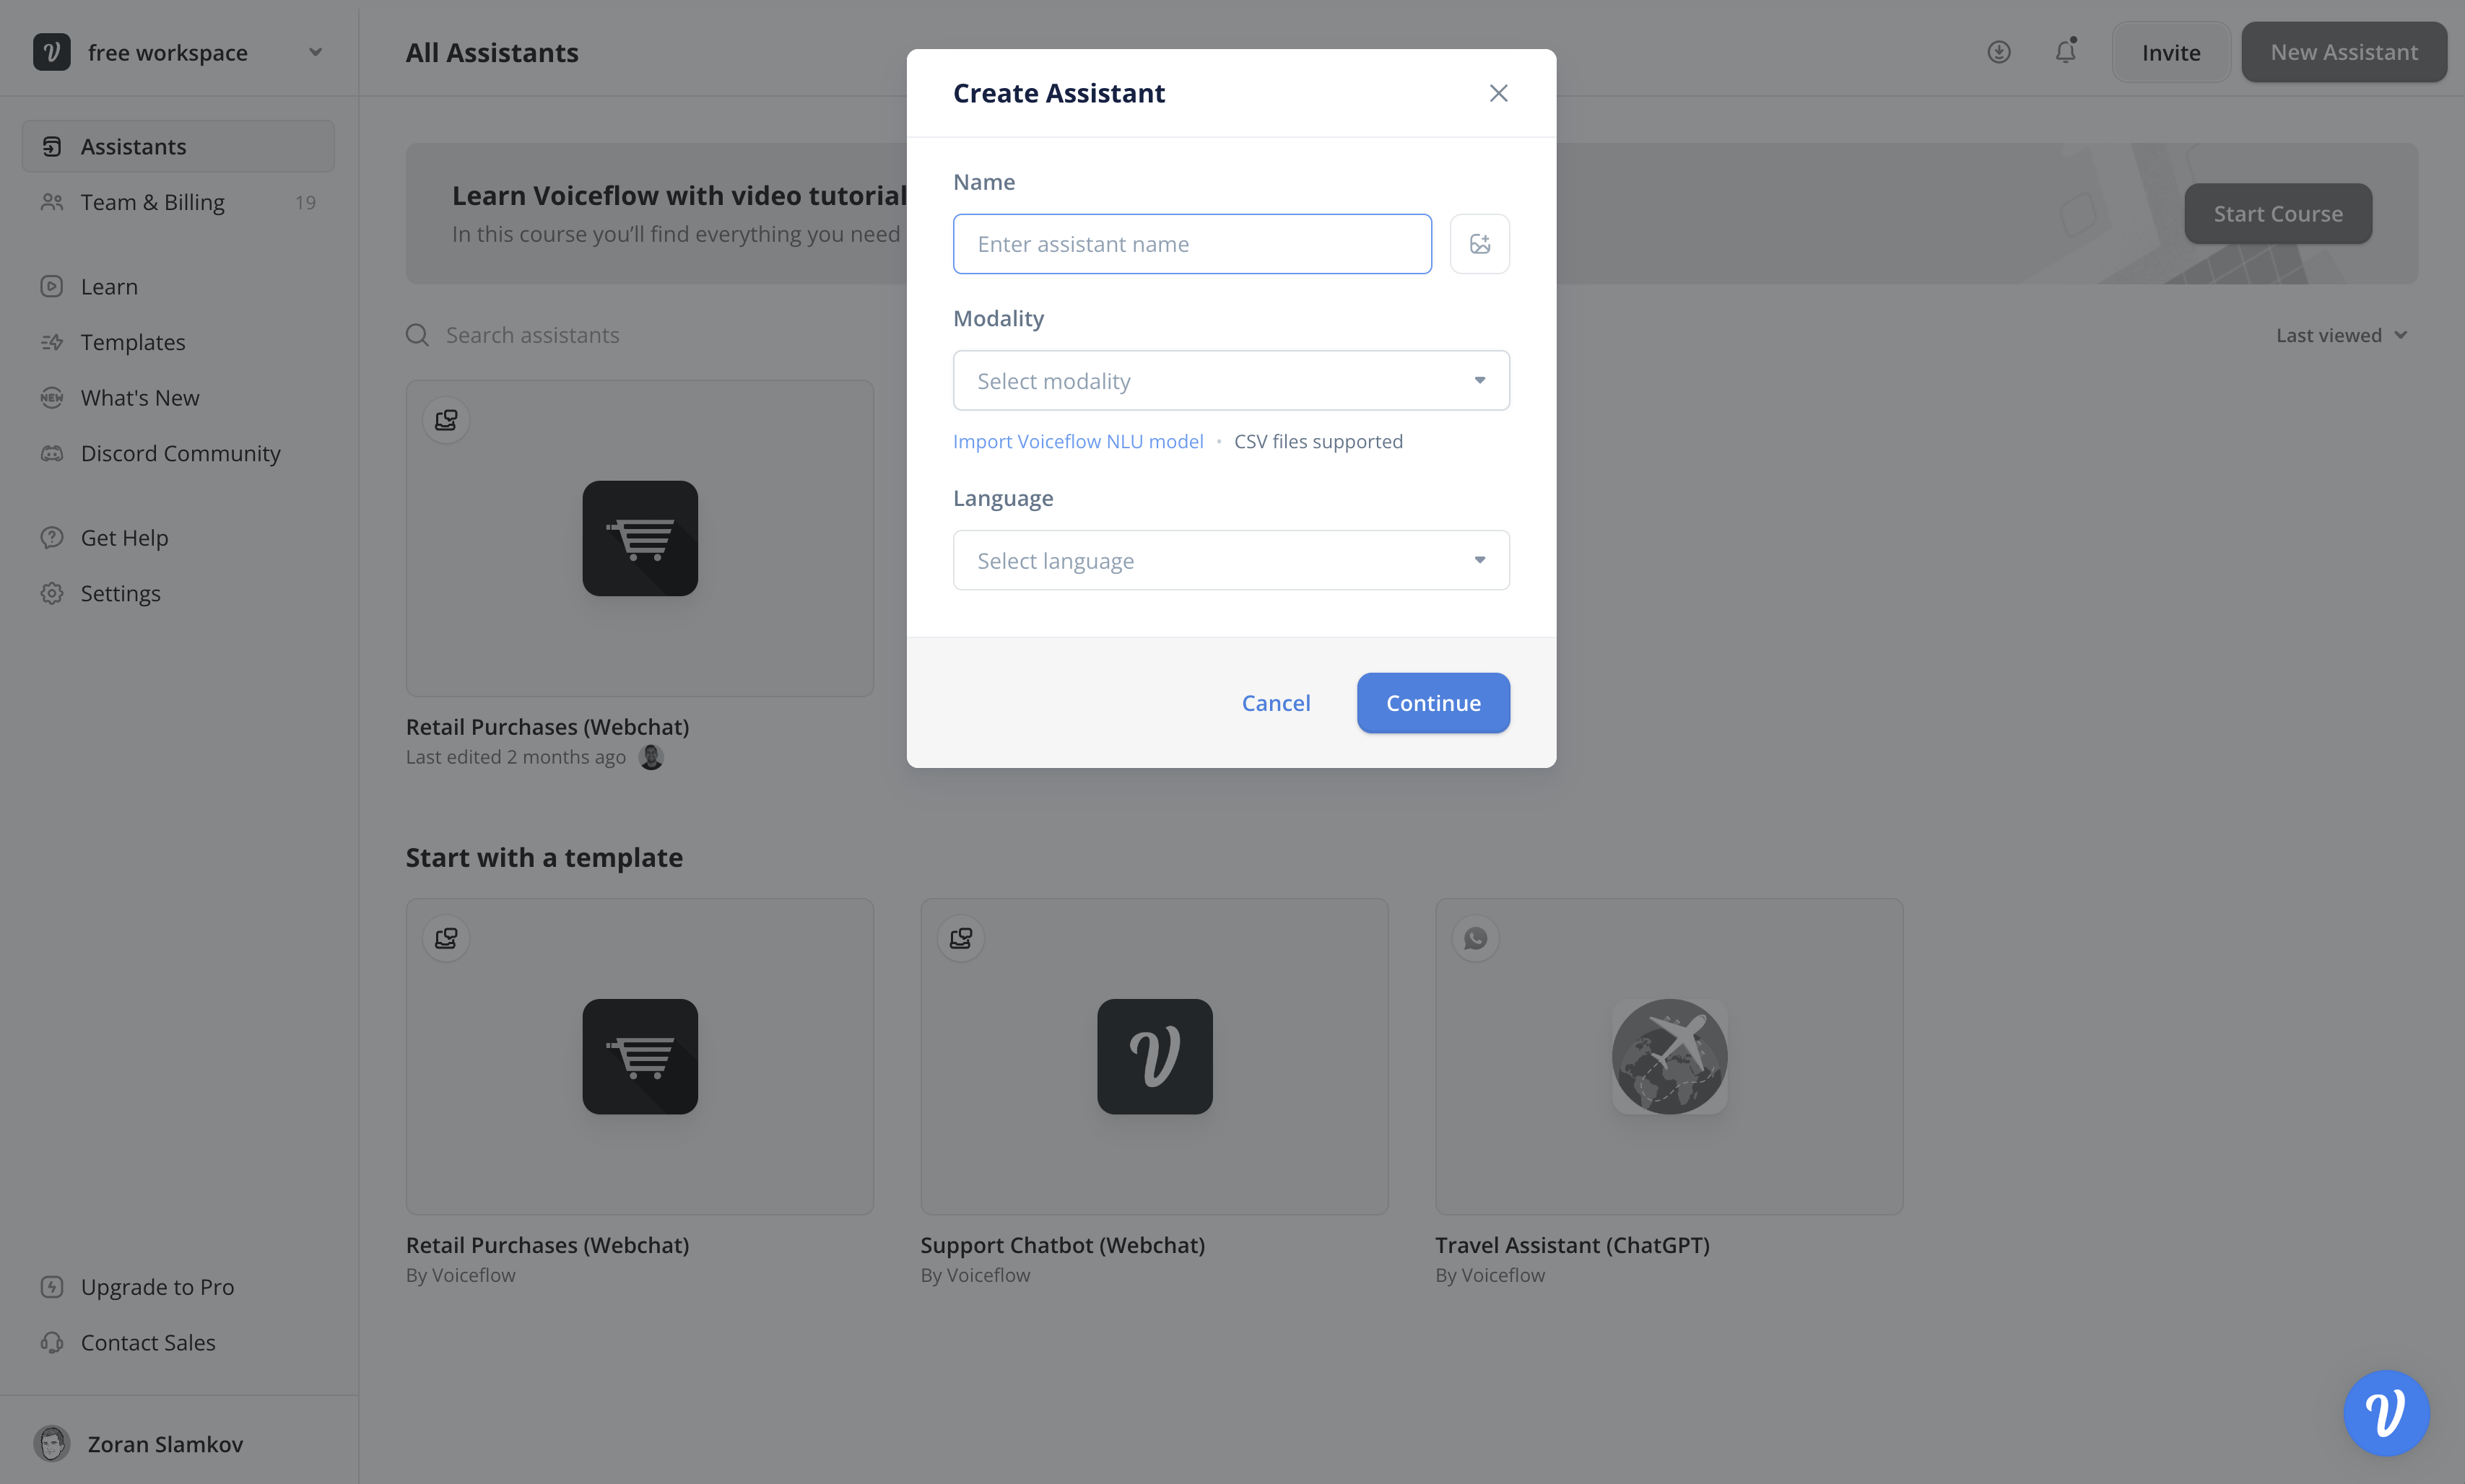
Step 1: Create a new agent
In your workspace click the 'New Assistant' button on the top right. Give your agent a name and select whether it is a 'Chat' or 'Voice' agent.
This walkthrough will focus on building and deploying an agent. If you are designing for an NLU platform. Visit our guide to building for export here.
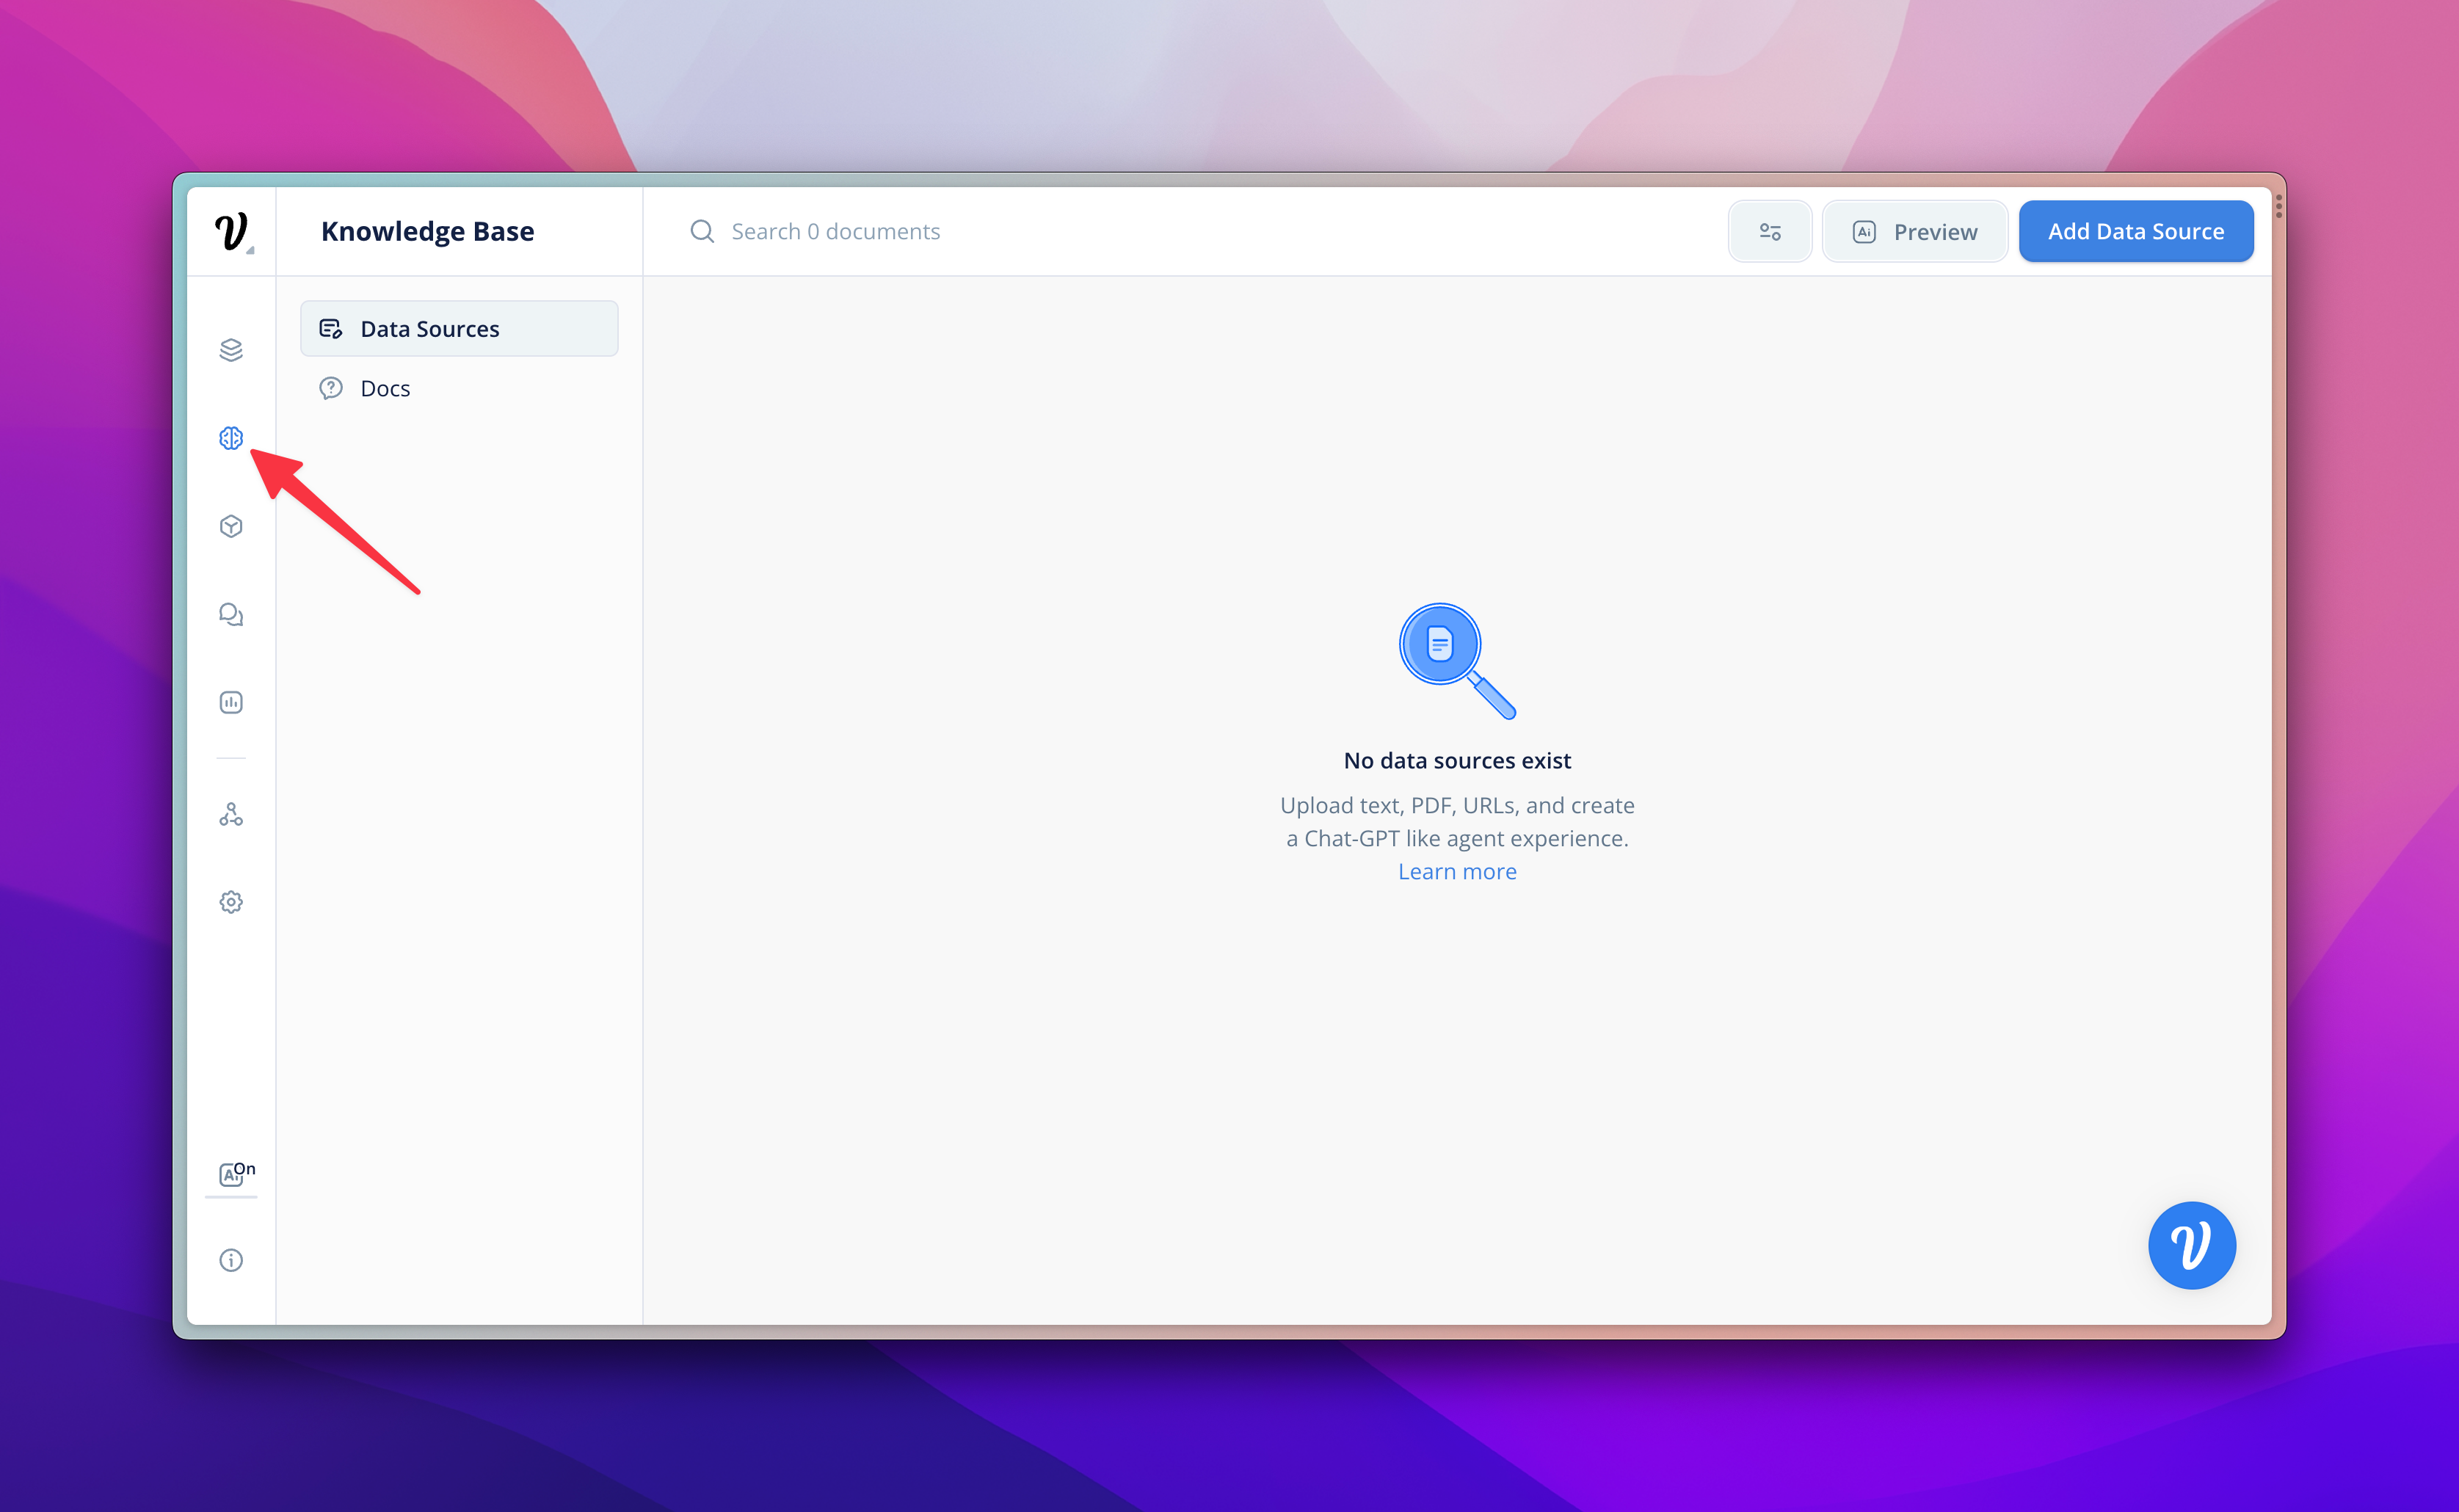
Step 2: Upload data to knowledge base
When the agent is created, go to the Knowledge Base. Here you can click on 'Add Data Source' on the top right and add as many PDFs, URLs, or Text files as you want to power your agent.
Once uploaded, your AI agent will use these documents to answer questions via GPT. The more documents you upload, the better the answers will be.
Note: There is a 10mb file limit per upload.
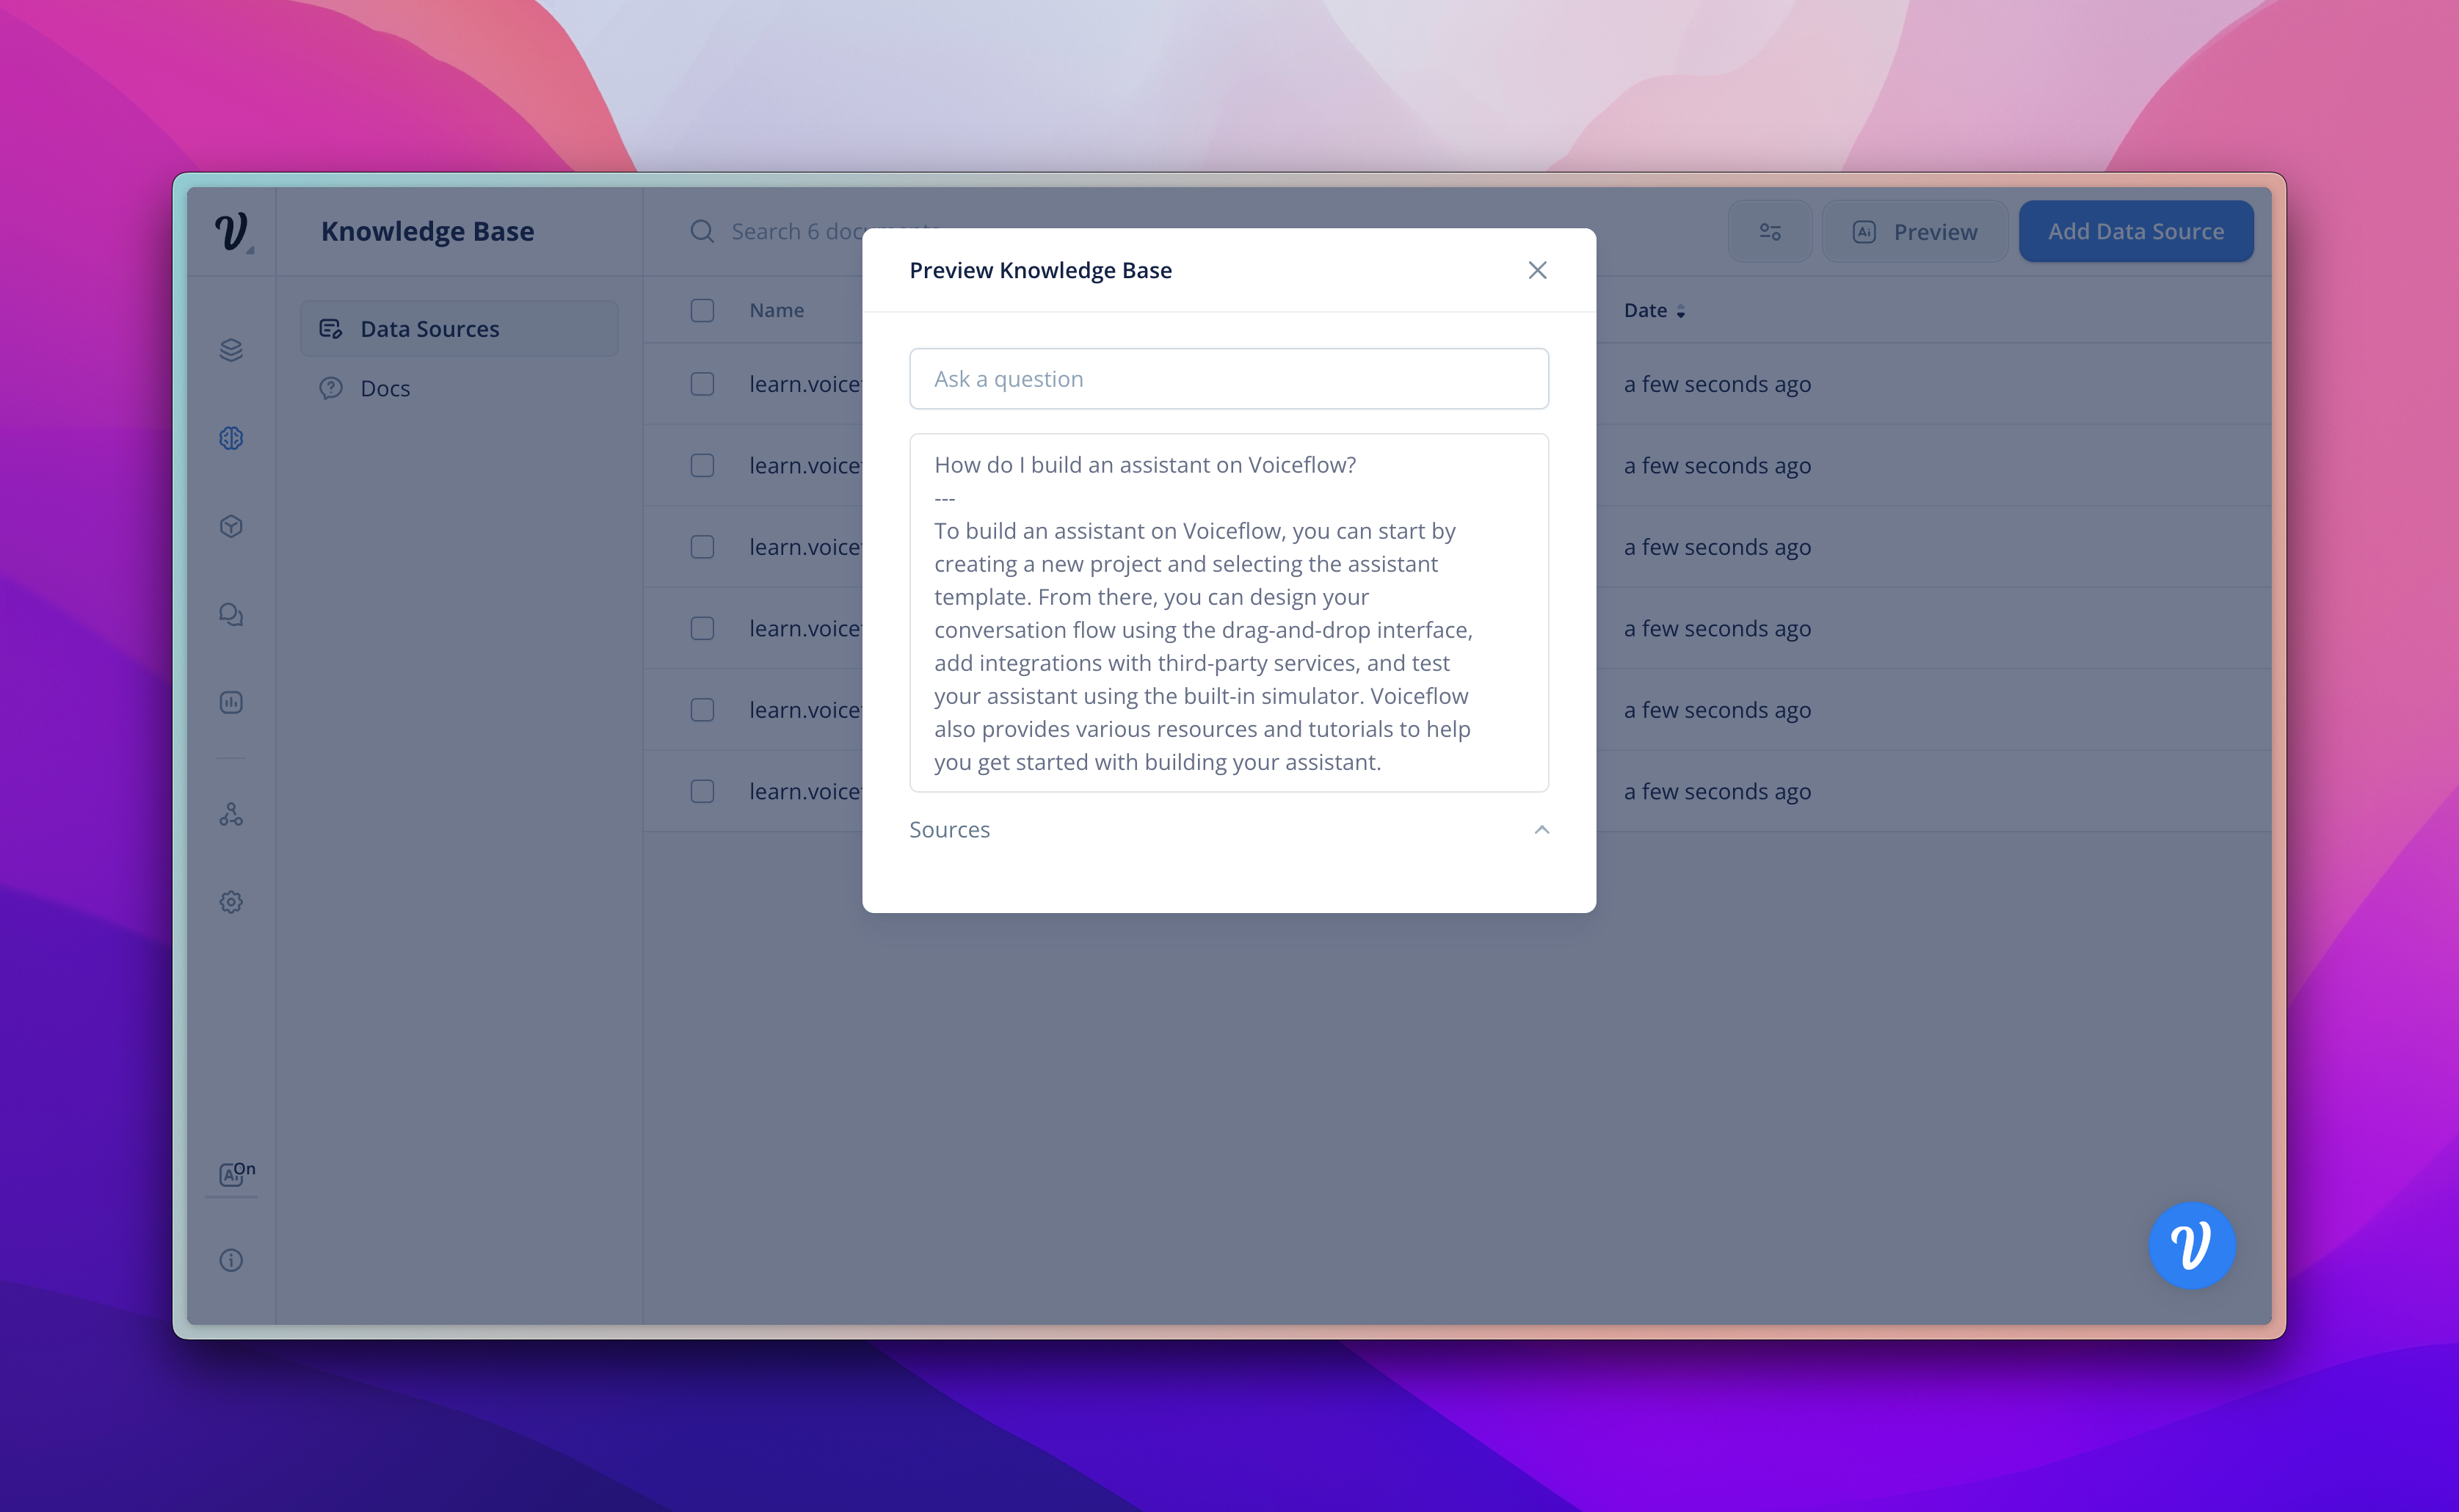
Once you've uploaded some initial documents, press 'Preview' on the top of the screen. This will allow you to ask the Knowledge Base questions and see what the responses are. Clicking sources will allow you to see where the answers are being pulled from.
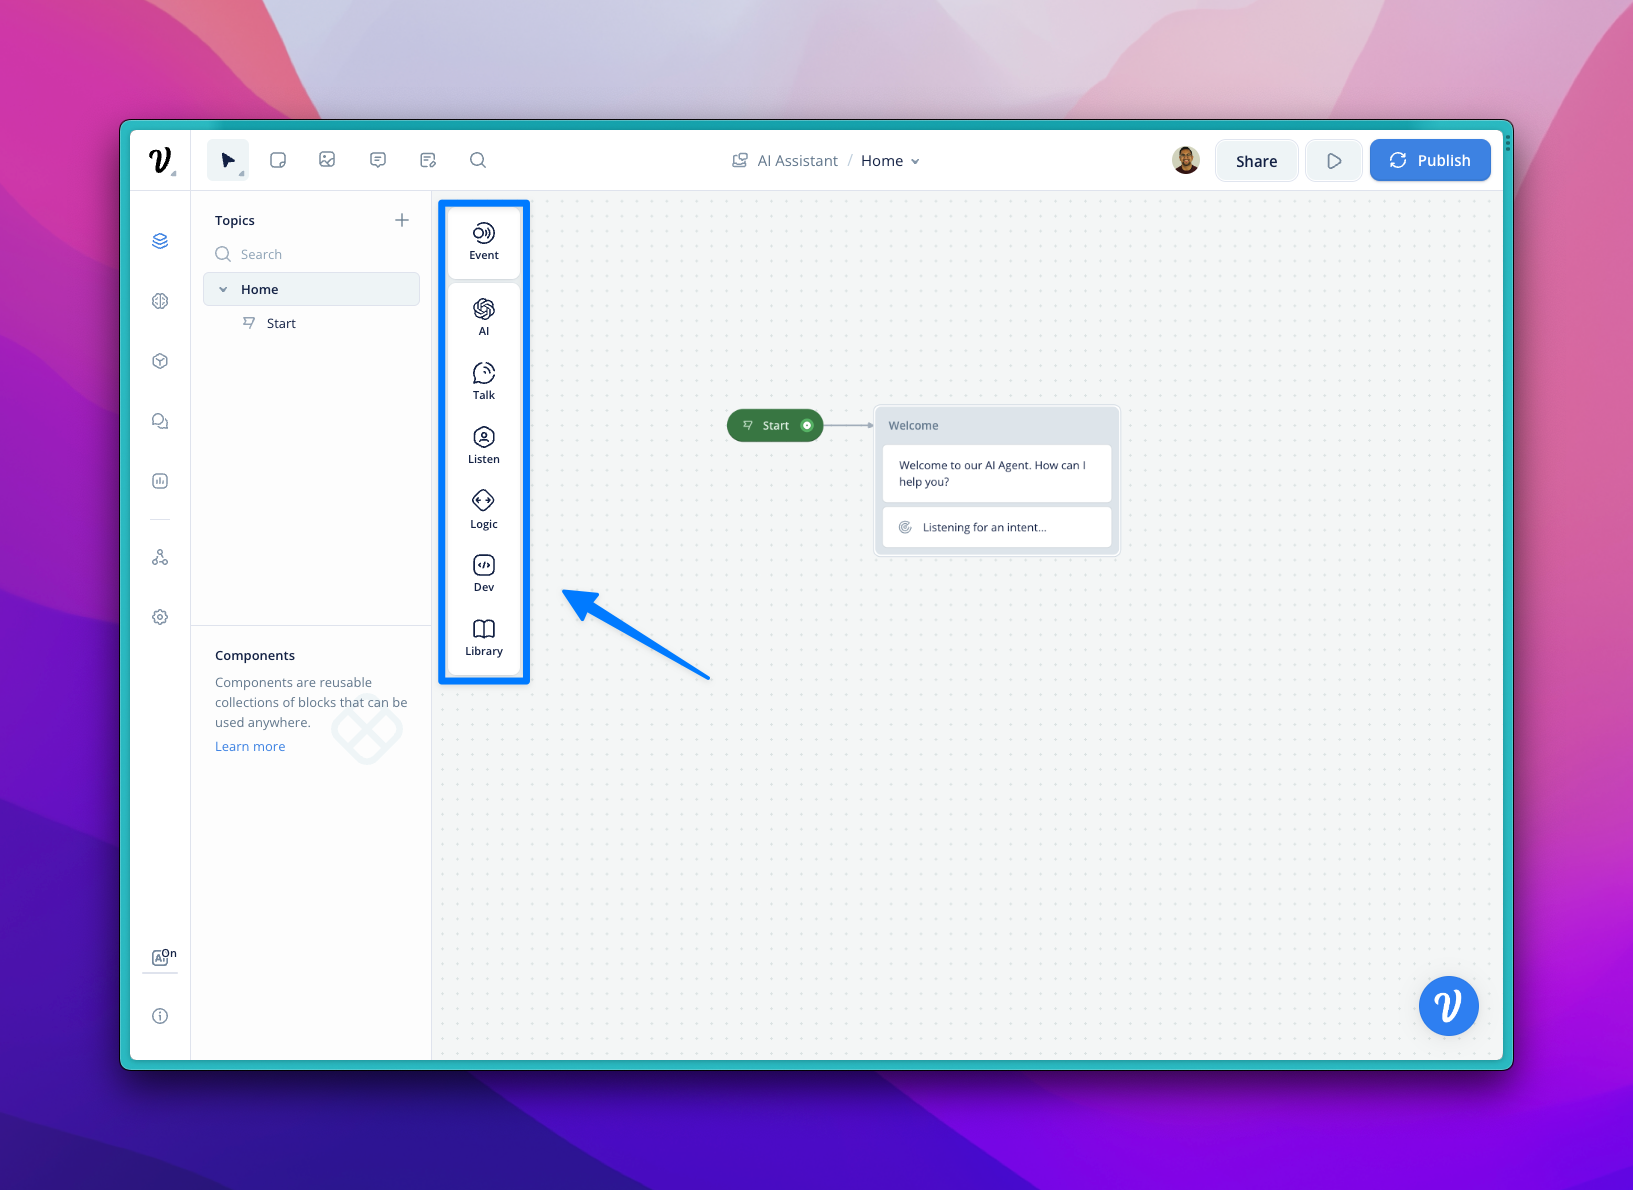
Step 3: Add a step to the canvas
Designing on Voiceflow starts at the step-level, which includes adding, editing, and connecting steps/blocks on the canvas and creating paths in your agent. Drag a step from this menu into your agent.
The AI steps allow you to send prompts to different AI models like GPT-4 and Claude. You can specify if you want to use the knowledge base or not to answer the prompt.
Details on each step can be found here.
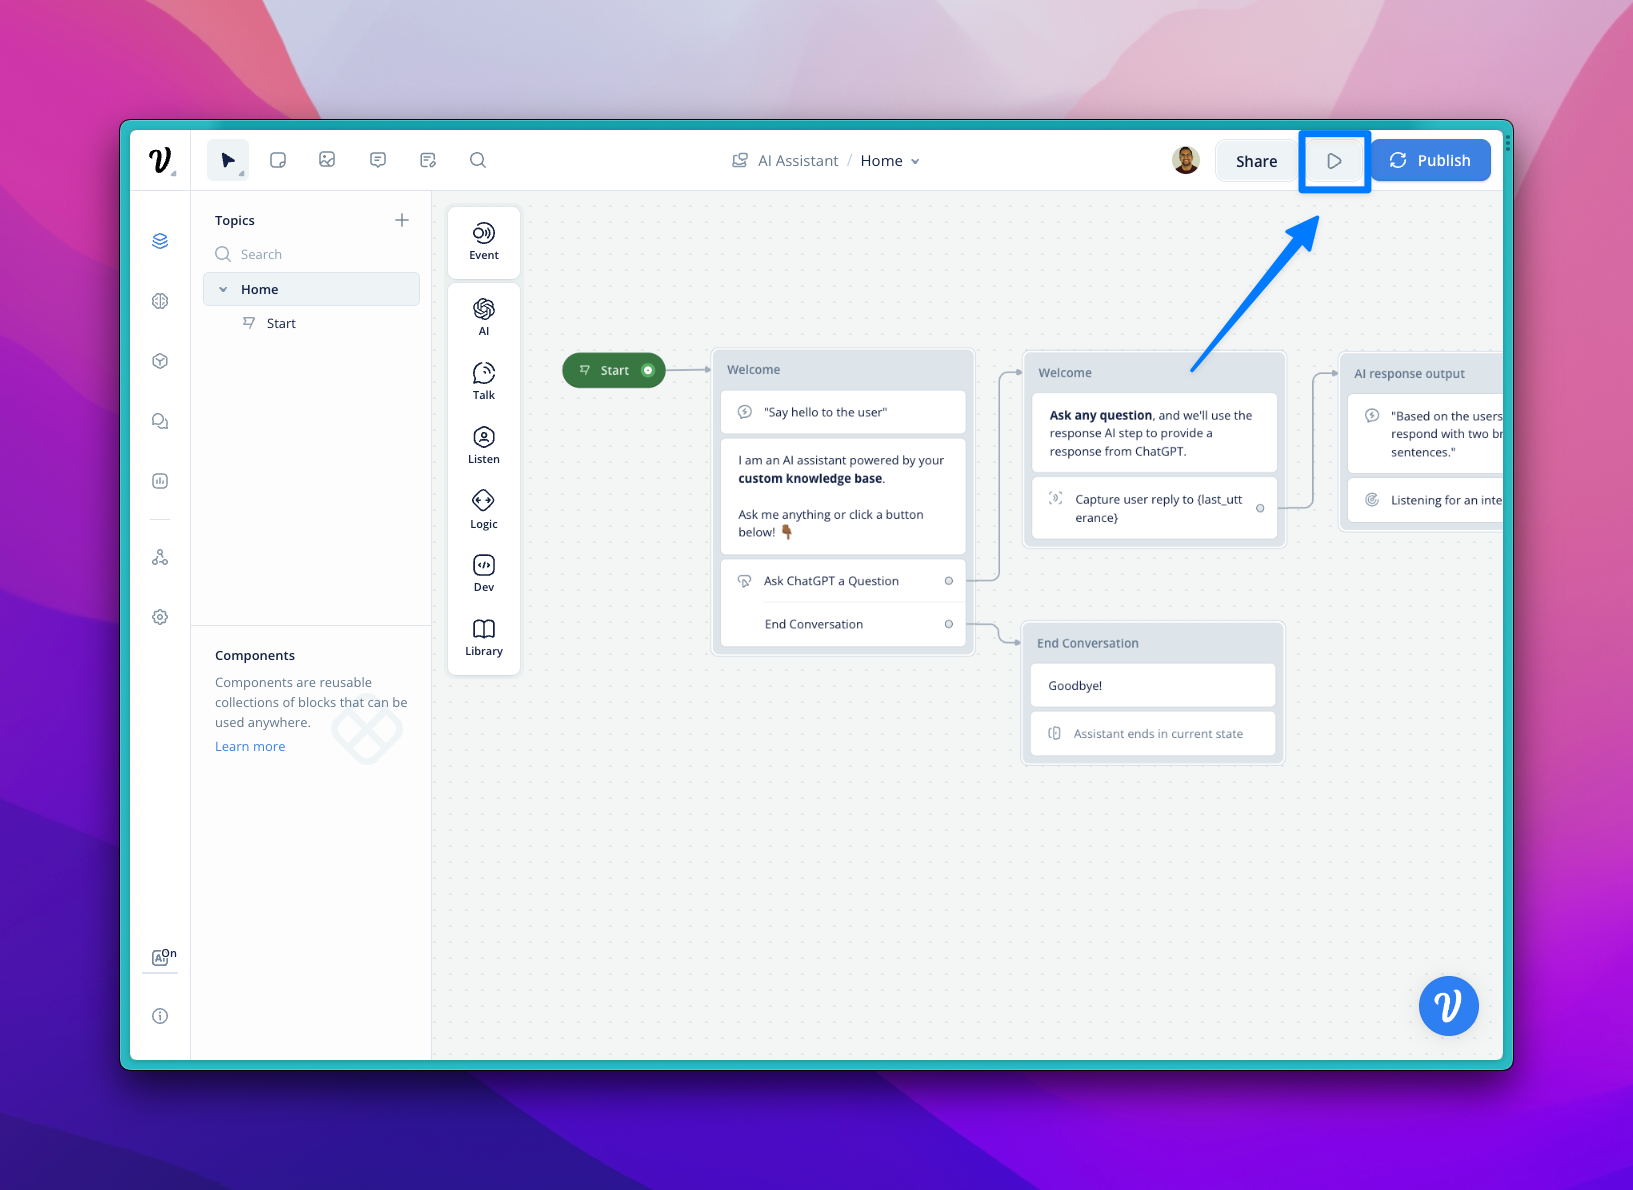
Step 4: Run a prototype
Once you have a basic agent, run a prototype to make sure that it works the way you intended. If it isn't working the way you expect, check our guide to debugging here.
Updated 5 months ago