
Voice-Forward & Account Linking
Introduction
In this article we will learn how to setup Voice-Forward Account Linking for Login for Amazon in your Voiceflow Alexa project.
Context
Sometimes, to access specific APIs on the behalf of the user, you need to setup the account linking feature in your Alexa skill. This will allow your users to login by voice or with their credentials via the Alexa app without sharing any credentials with you.
For this project, as we want to use the Voice-Forward feature, we are going to use the Login for Amazon service to authenticate and access user’s information.
How it works
- Create a new Security Profile on Login with Amazon portal
- Setup Account linking and permissions on the Alexa Developer Console (ADC)
- Handle the needed Directives and Events steps in your Voiceflow project
- Retrieve user’s access token, consent token and use them to make authenticated API calls
Step 1 | Create an Alexa project
The first thing we want to setup is our Alexa project. We don’t need to design it for now, we only want to upload it to Alexa to get access to it within the Alexa Developer Console for the next step.
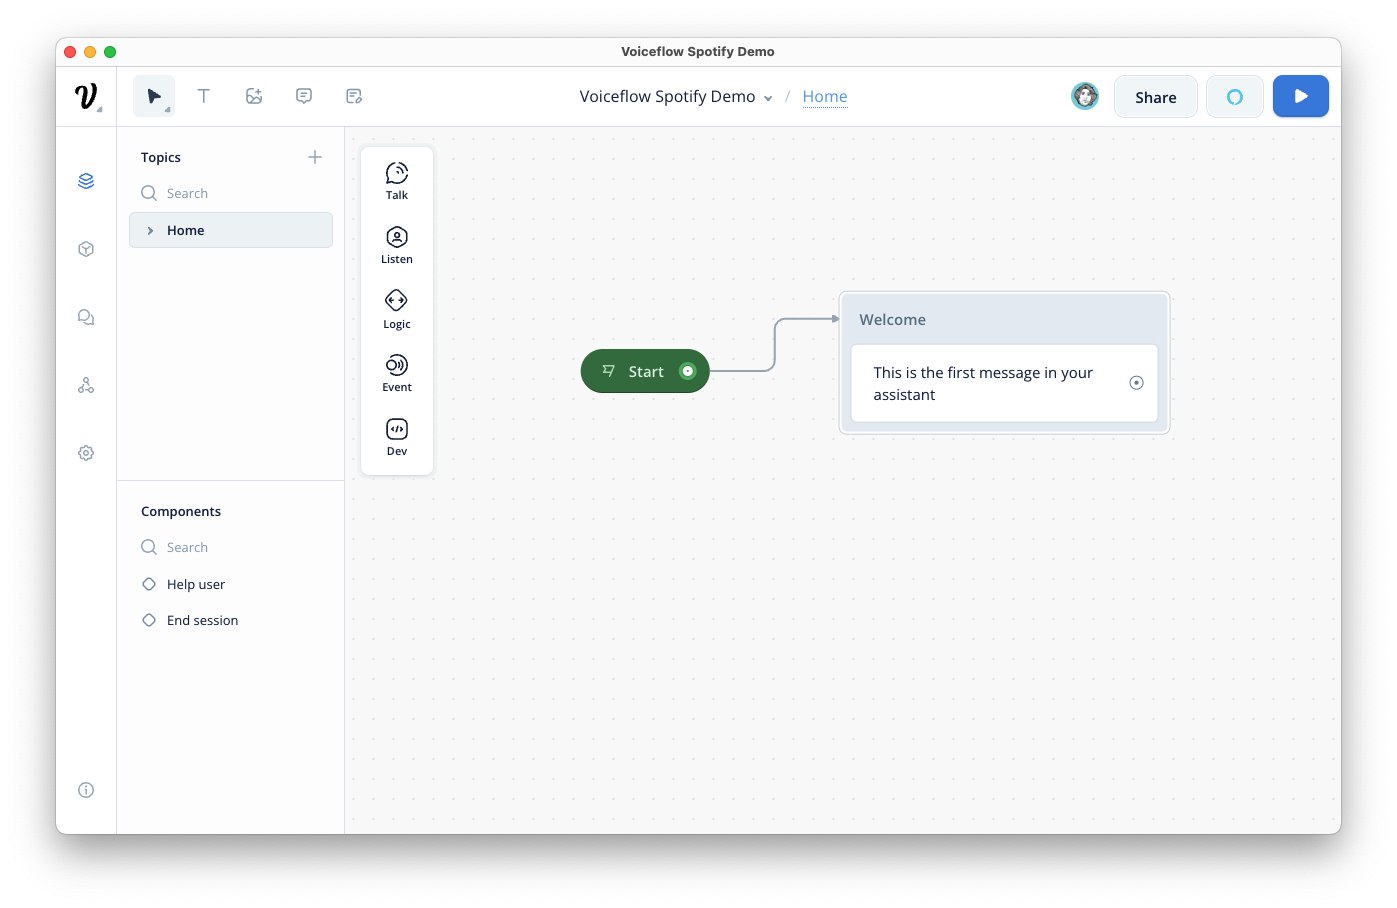
In Voiceflow, create a new Alexa project, give it a name and upload it to the Alexa Developer Console (ADC) by clicking on the Upload to Alexa button.
On the Alexa Developer Console, we need to get some redirect URLs to setup Login with Amazon.
Be sure to be on the Build tab, TOOLS section and click on Account linking.
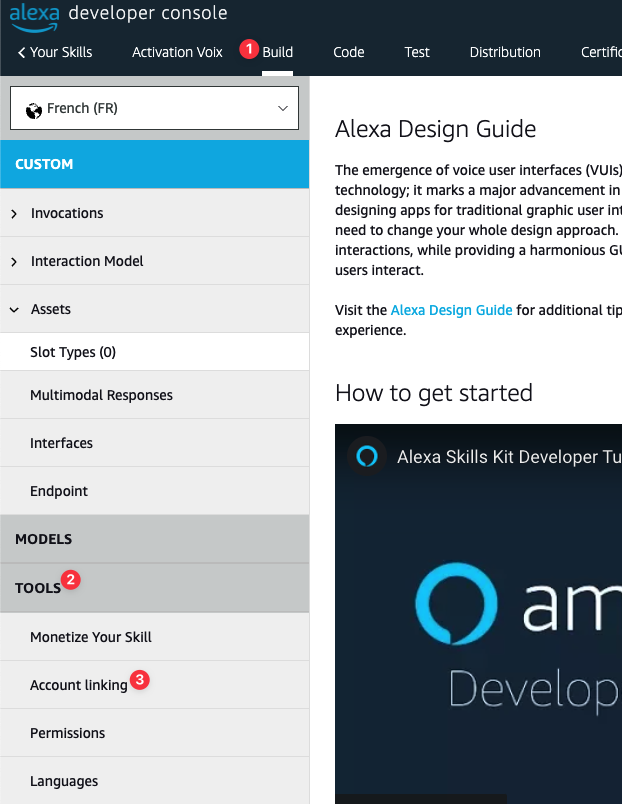
On the main page, go to the bottom to see the Alexa Redirect URLs:

Keep this tab open as we will need to access this information in our next step.
Step 2 | Create a new Security Profile on Login with Amazon portal
On another tab, go to the Login with Amazon portal
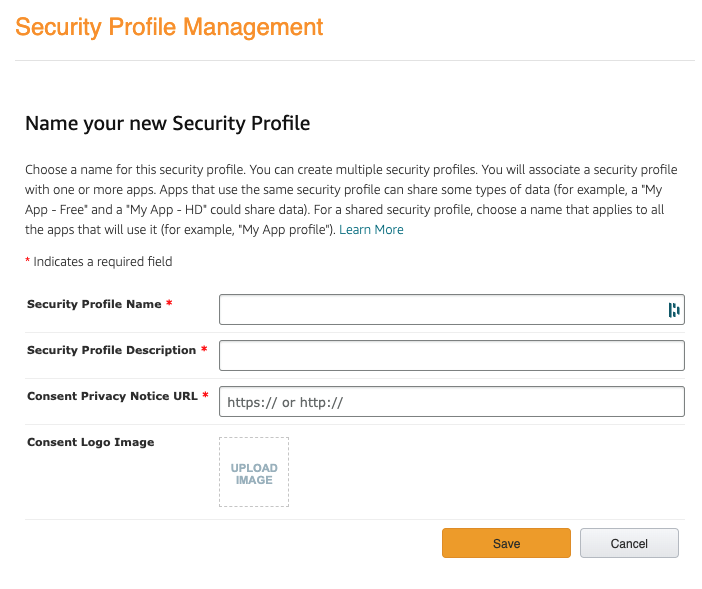
And click on Create a New Security Profile.

Fill in the requested info and click on Save.
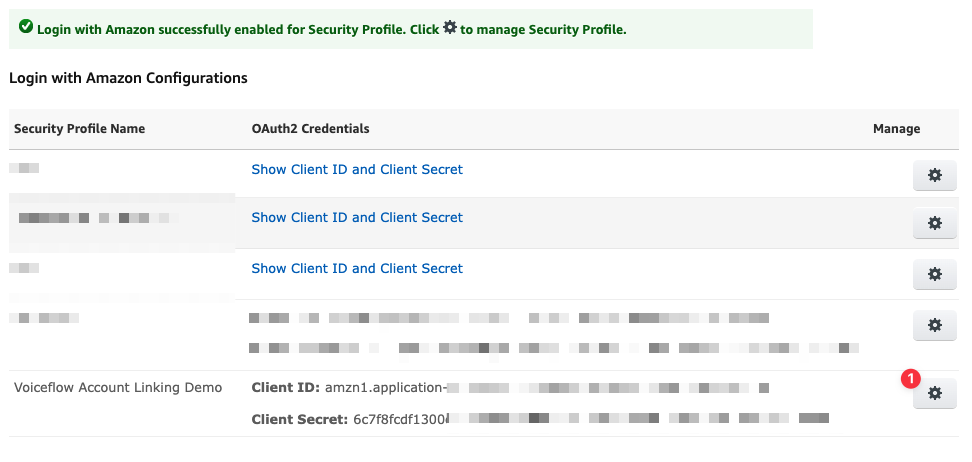
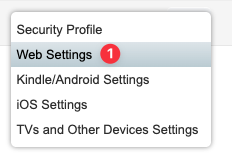
Back on the main screen, move over the little gear to manage the profile you’ve just created.
In the drop-down menu, select Web Settings:
Click on Edit as we need to add the Return URLs from the Alexa Developer Console Account linking page from our other tab.
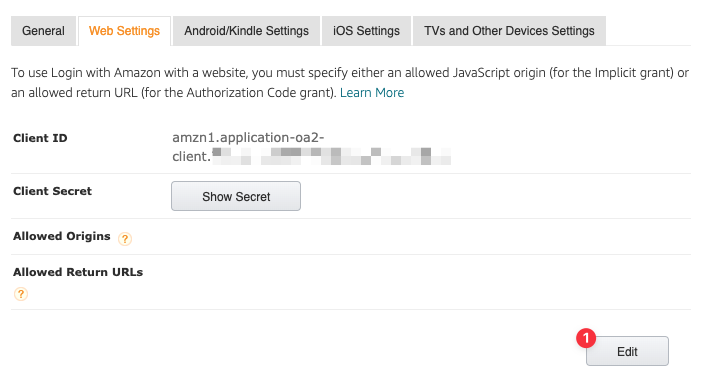
Add the 3 URLs from the Alexa Developer Console and click on Save.

Keep that page open to get access to the Client ID and Client Secret a bit later.
Step 3 | Setup Account Linking for your Skill
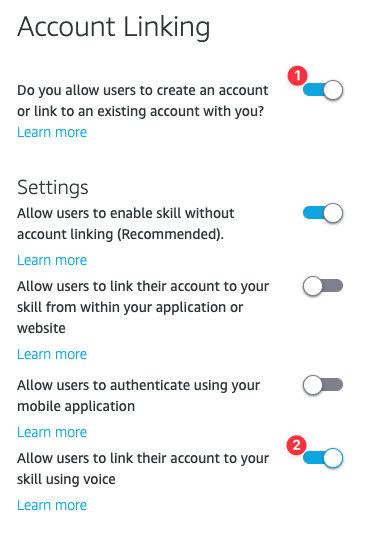
Switch back to the Alexa Developer Console tab and enable Account linking by clicking on the first toggle as well as the last one to allow user to link their account using voice.
To fill all the information needed here you can refer to the Configure an Authorization Code Grant documentation at the bottom of this article but to help you with this process, here is what you will need to do to setup the Login with Amazon account linking:
Your Web Authorization URI:
https://www.amazon.com/ap/oa
Access Token URI:
https://api.amazon.com/auth/o2/token
Your Client ID & Client Secret
You can get this information from the Login with Amazon page:

Your Authentication Scheme:
HTTP Basic
Scope:
profile
postal_code
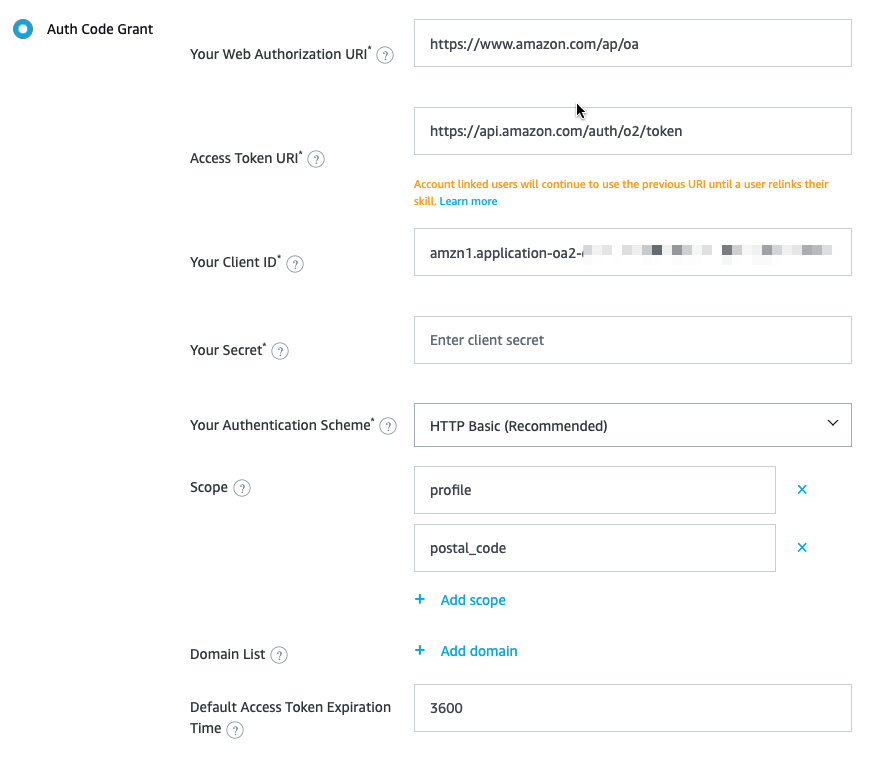
When done, click on the Save button on page the top right:

Step 4 | Add the needed permissions to your Skill
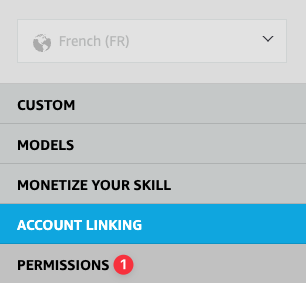
Now, on the left sidebar, click on PERMISSIONS:
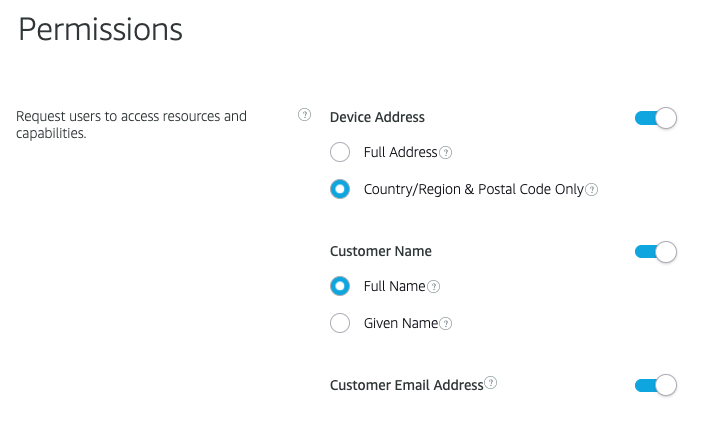
And activate the following permissions:
Step 5 | Design your Voiceflow Alexa project
On the project, let’s add a simple Welcome Speak step followed by a Set step.
In the Set step, we are going to create and populate the {apiEndpoint} and {consentToken} with some data form the _system variable.
In our case, we want the access token returned by the account linking, the api endpoint to use in our API call as well as the consent token to authorize those calls.
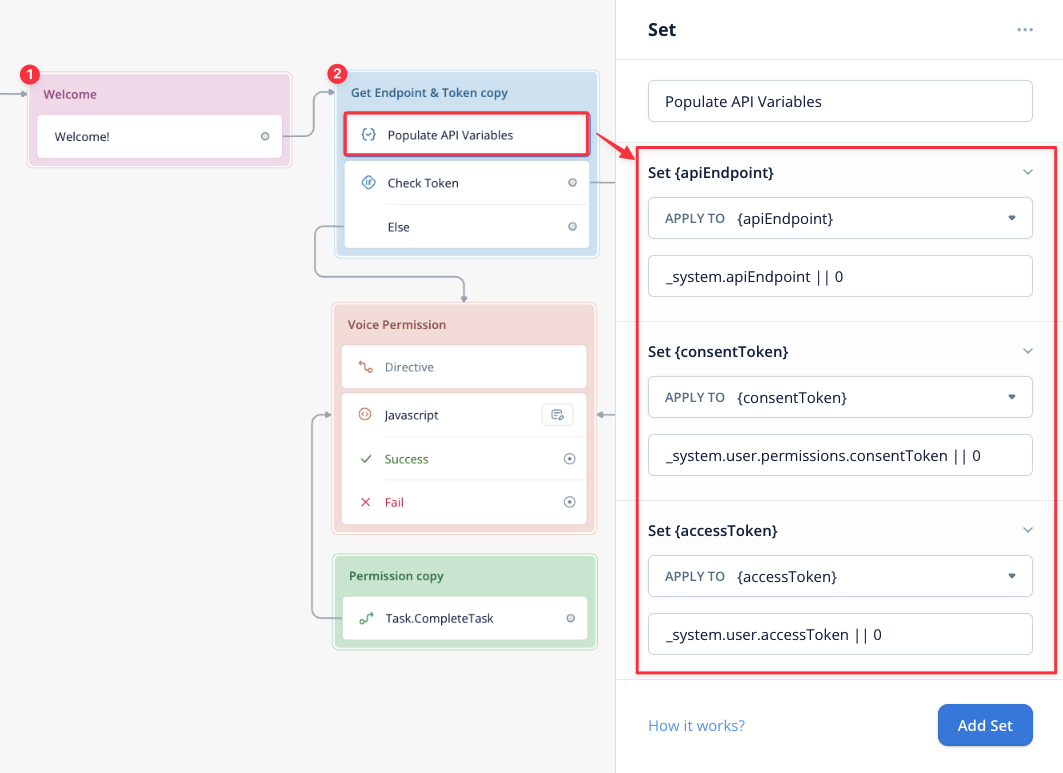
{apiEndpoint}
_system.apiEndpoint || 0
{consentToken}
_system.user.permissions.consentToken || 0
{accessToken}
_system.user.accessToken || 0
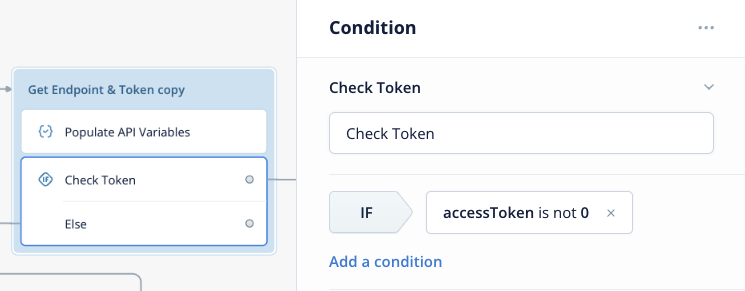
The following step in block is a Condition to check the {accessToken} variable value:
To allow the user to authorize with their voice, we need to use the Connections.StartConnection directive.
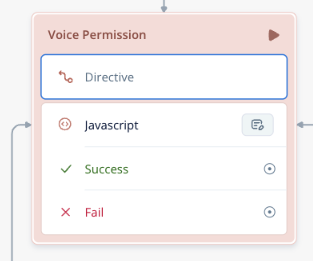
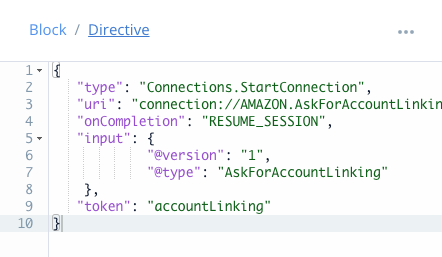
Drag a Directive step on the canvas and populate it with the following code:
{
   "type": "Connections.StartConnection",
   "uri": "connection://AMAZON.AskForAccountLinking/1",
   "onCompletion": "RESUME_SESSION",
   "input": {
            "@version": "1",
            "@type": "AskForAccountLinking"
    },
   "token": "accountLinking"
}
If you want to learn more about this directive, do not hesitate to check the Voice-Forward Account Linking link in the Documentation section of the article.
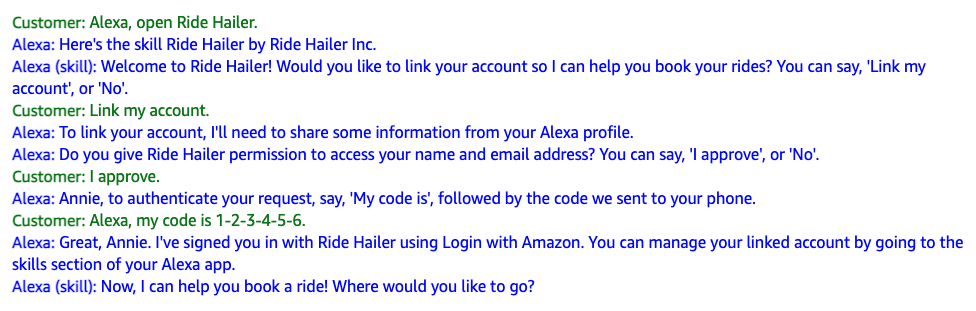
Thanks to that directive, Alexa will handle most of the process here:
But, as explained in the documentation, we will have to handle the returned request, we can do so with the Event step.
First we want to be sure to keep the session open by using a Javascript step and the following code:
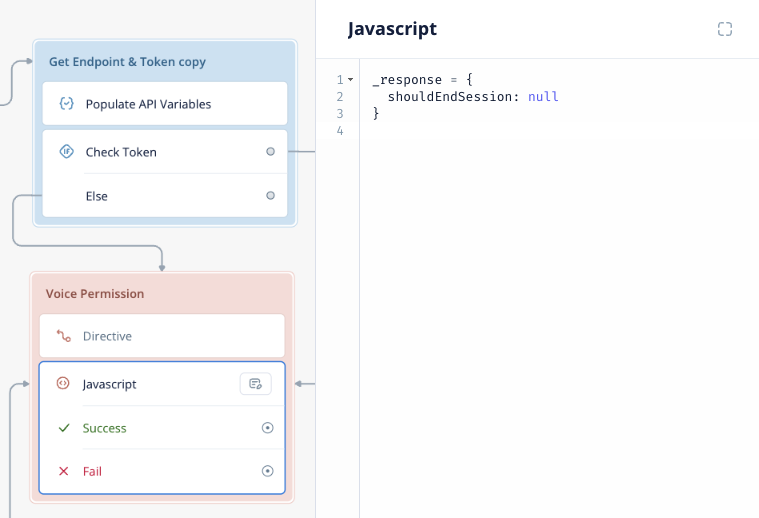
_response = {
  shouldEndSession: null
}
This will allow the skill to keep listening for any event.
We are looking for two events here, the Task.CompleteTask and the SessionResumedRequest so let’s create two Event steps to handle that.
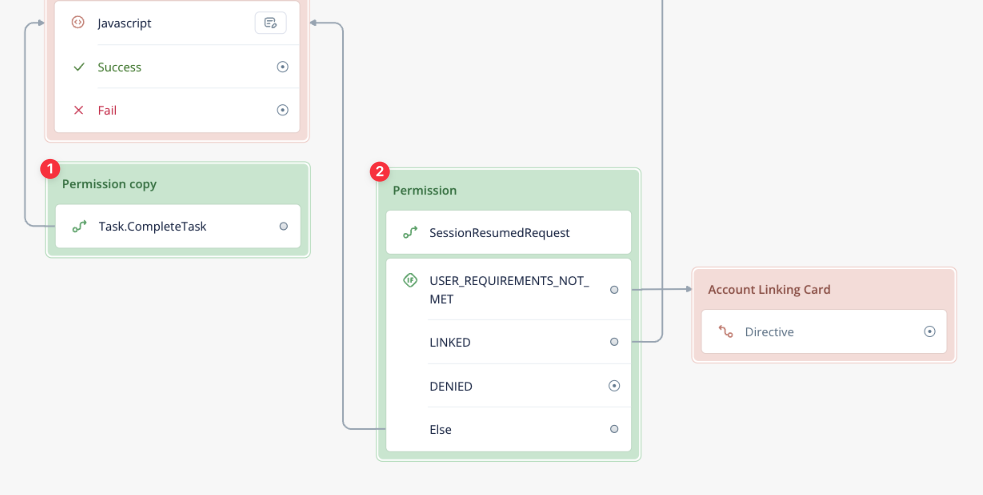
The first one is just here to redirect any Task.CompleteTask event to the Javascript step that keep the session open.
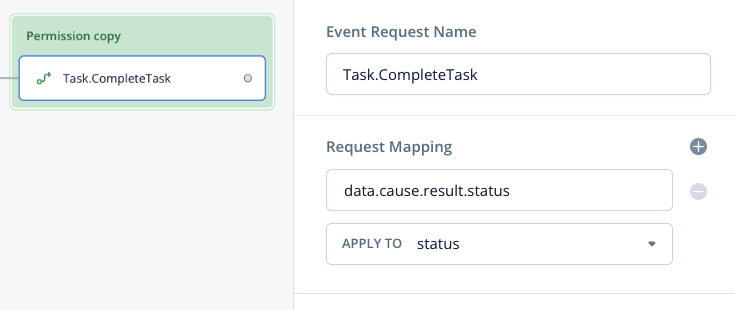
Set the Event Request Name to:
Task.CompleteTask
We are not really using any data from it so you can ignore the Request Mapping part.
The SessionResumedRequest is the one we are looking for to handle the account linking process.
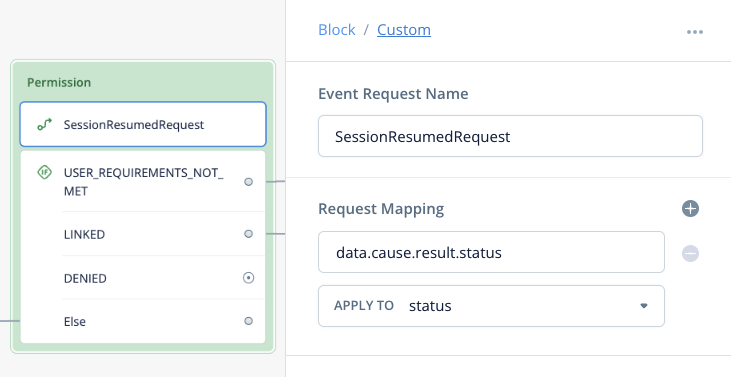
Set the Event Request Name to:
SessionResumedRequest
And the Request Mapping as follow:
data.cause.result.status > {status}
Now that we have the Event info mapped to our {status} variable, we can use it in a Conditions step to redirect the user.
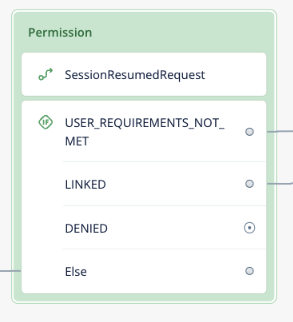
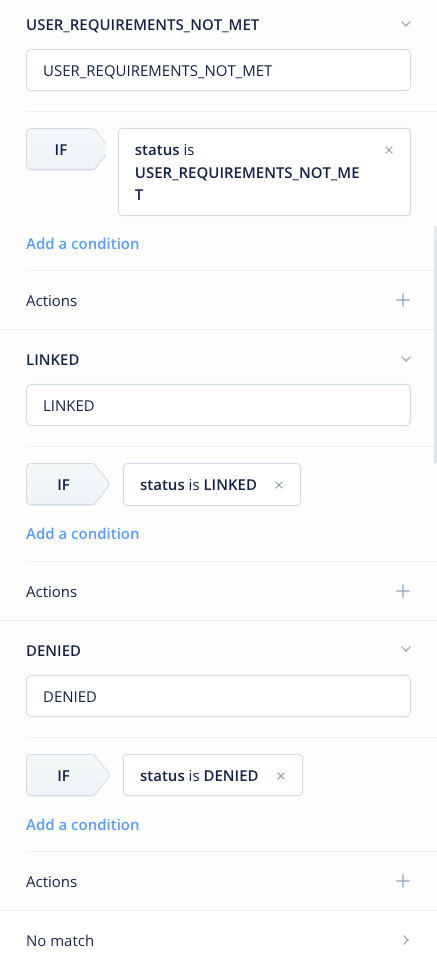
Again, you can find more details in the documentation at the bottom of the article but to summarize, if the {status} variable value is:
USER_REQUIREMENTS_NOT_MET > We want to generate an Account Linking card and allow the user to authenticate within the Alexa app.
LINKED > The user successfully link their account
DENIED > The user says “No” to the prompt
- The DENIED port doesn’t need to be linked to anything, if the user refuse the link their account, Alexa will say “Okay, you can link your account at any time by going to the skills section of your Alexa app.” and we can exit the skill.
- The Else port will redirect the user to the Javascript step to let the session open.
- The LINKED port will follow the pass to tell the user that their account has been linked and the 2 API calls we will make to retrieve user’s info.
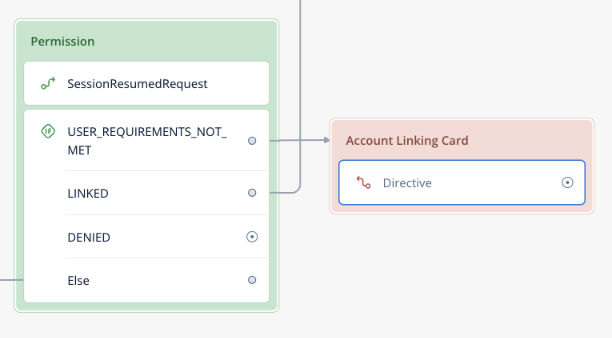
- The USER_REQUIREMENTS_NOT_MET port is linked to another Directive step to generate the Account Linking card and exit the skill.
Let’s create the Account Linking card with a Directive step so we can link the USER_REQUIREMENTS_NOT_MET port to it.
Drag a Directive step and paste the following code in it:
{
    "version": "1.0",
    "sessionAttributes": {},
    "response": {
      "outputSpeech": {
        "type": "PlainText",
        "text": "You must have an Amazon account to use this skill. Please use the Alexa app to link your Amazon account."
      },
      "card": {
        "type": "LinkAccount"
      },
      "shouldEndSession": true
    }
}
Then link it to the USER_REQUIREMENTS_NOT_MET port.
While we are here, let’s also link the Else port to our Javascript step.

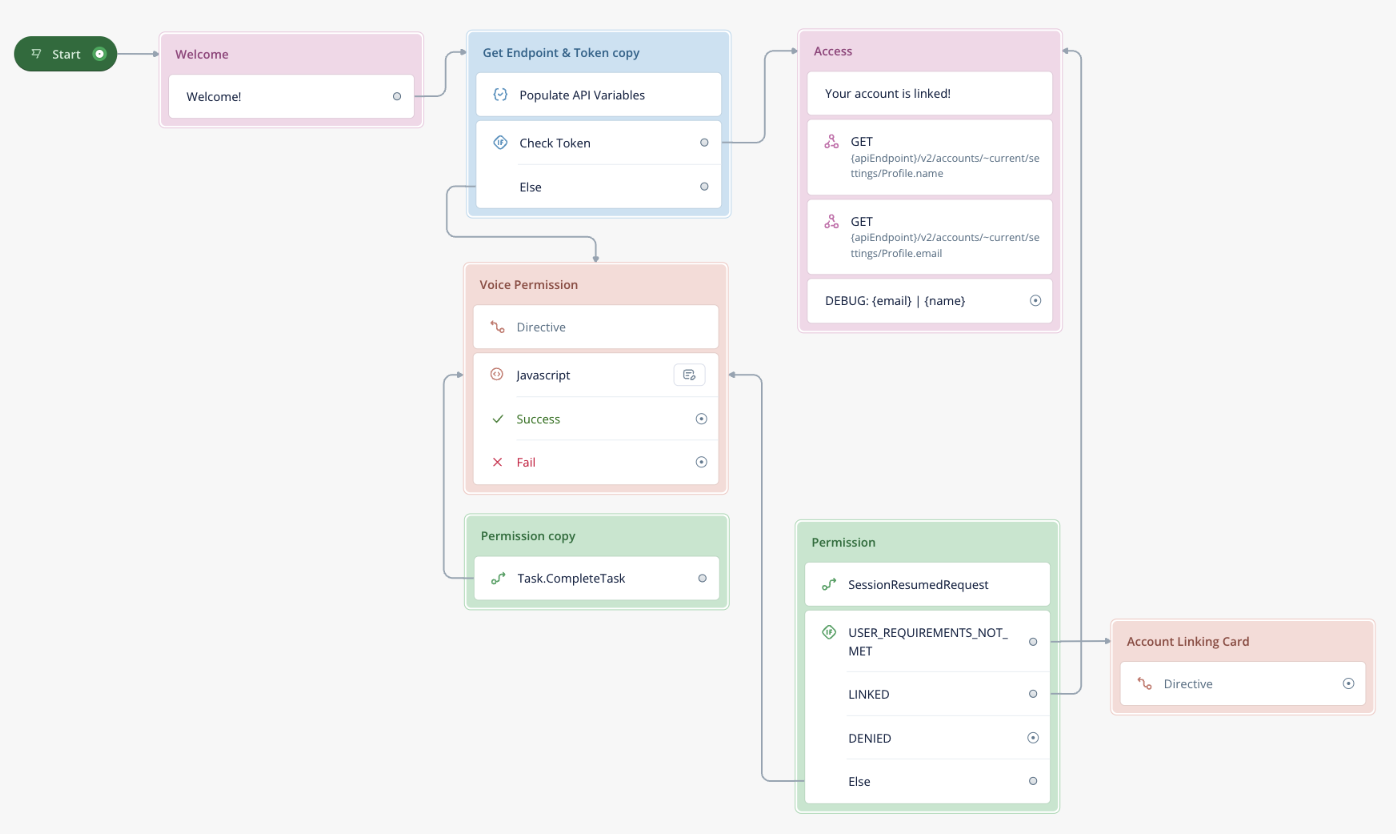
For the LINKED port, we are going to create the ‘Access’ block with a Speak step for the confirmation message, 2 API steps to retrieve user’s info (name and email) and a final Speak step to debug the info.
It will look to something similar to this:
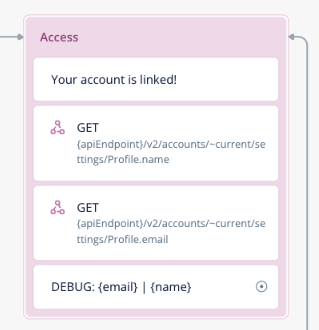
The first Speak step is only here to confirm that we were able to retrieve the access token from the account linking, or, if the user launch the skill again after having previously done the account linking process, refresh that token.
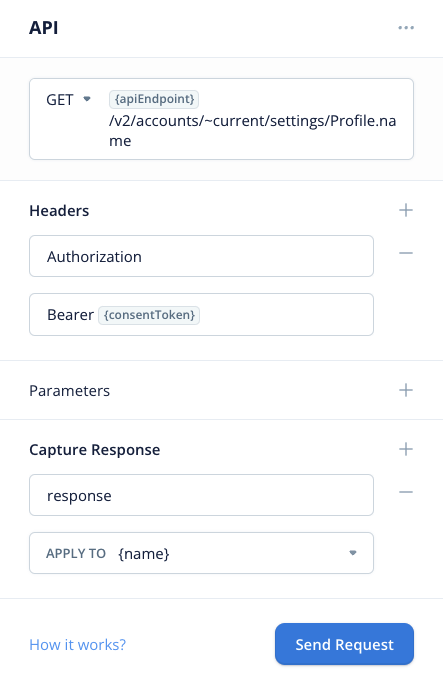
The first API step will get the user’s name by making the following request:
GET URL > {apiEndpoint}/v2/accounts/~current/settings/Profile.name
Headers > Authorization: Bearer {consentToken}
Mapping > response to {name}
The second API step will get the user’s email by making the following request:
GET URL > {apiEndpoint}/v2/accounts/~current/settings/Profile.email
Headers > Authorization: Bearer {consentToken}
Mapping > response to {email}

In the last Speak step we are simply debugging the {name} and {email} variables values.
If you’ve followed this guide so far, this is how your project should look like.
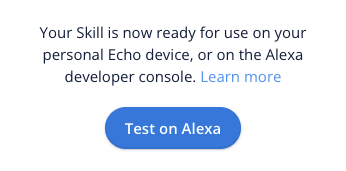
Upload it to Alexa and test it in the Alexa Developer console (with a mic so Alexa can recognize your voice) or on an Echo device.
⚠️ Do not forget to create a voice id in the Alexa app > Settings > Your Profile & Family section to be able to fully test your skill.Information
💡 For each upload, you might need to wait around 3-5 minutes for the changes made into your Voiceflow project to populate on the Alexa Developer Console and being able to fully test the skill.
A good way to be sure that you are testing the updated version is to use a Speak step at the very beginning of your project with a version number. That way you can quickly know if you’re testing the correct updated version or if you have to wait a bit for your changes to propagate.
Documentation
Configure an Authorization Code Grant
Configure an Authorization Code Grant | Alexa Skills Kit
Voice-Forward Account Linking
Use Voice-Forward Account Linking for Alexa Skills (LWA) | Alexa Skills Kit
Voice-Forward Account Linking Implementation Details (LWA) | Alexa Skills Kit
Request Customer Contact Information
Request Customer Contact Information for Use in Your Skill | Alexa Skills Kit
Updated 4 months ago