
Step 1 - Create a Project
Once you have successfully signed up for Voiceflow and verified your email, you're ready to start creating a Project.
Create a Project
A project in Voiceflow is one assistant or agent. When you visit the dashboard, you'll see a list of all your Projects. There are three ways to create a new Project on Voiceflow:
- Use a template
- Create a Project from scratch
- Import a Project
This walkthrough follows the steps to create a new project from scratch. If you are using a template - simply sign into Voiceflow, go to the templates page and select the project you want. When you download it you will get a prompt to add to your workspace.
Create a Project from Scratch
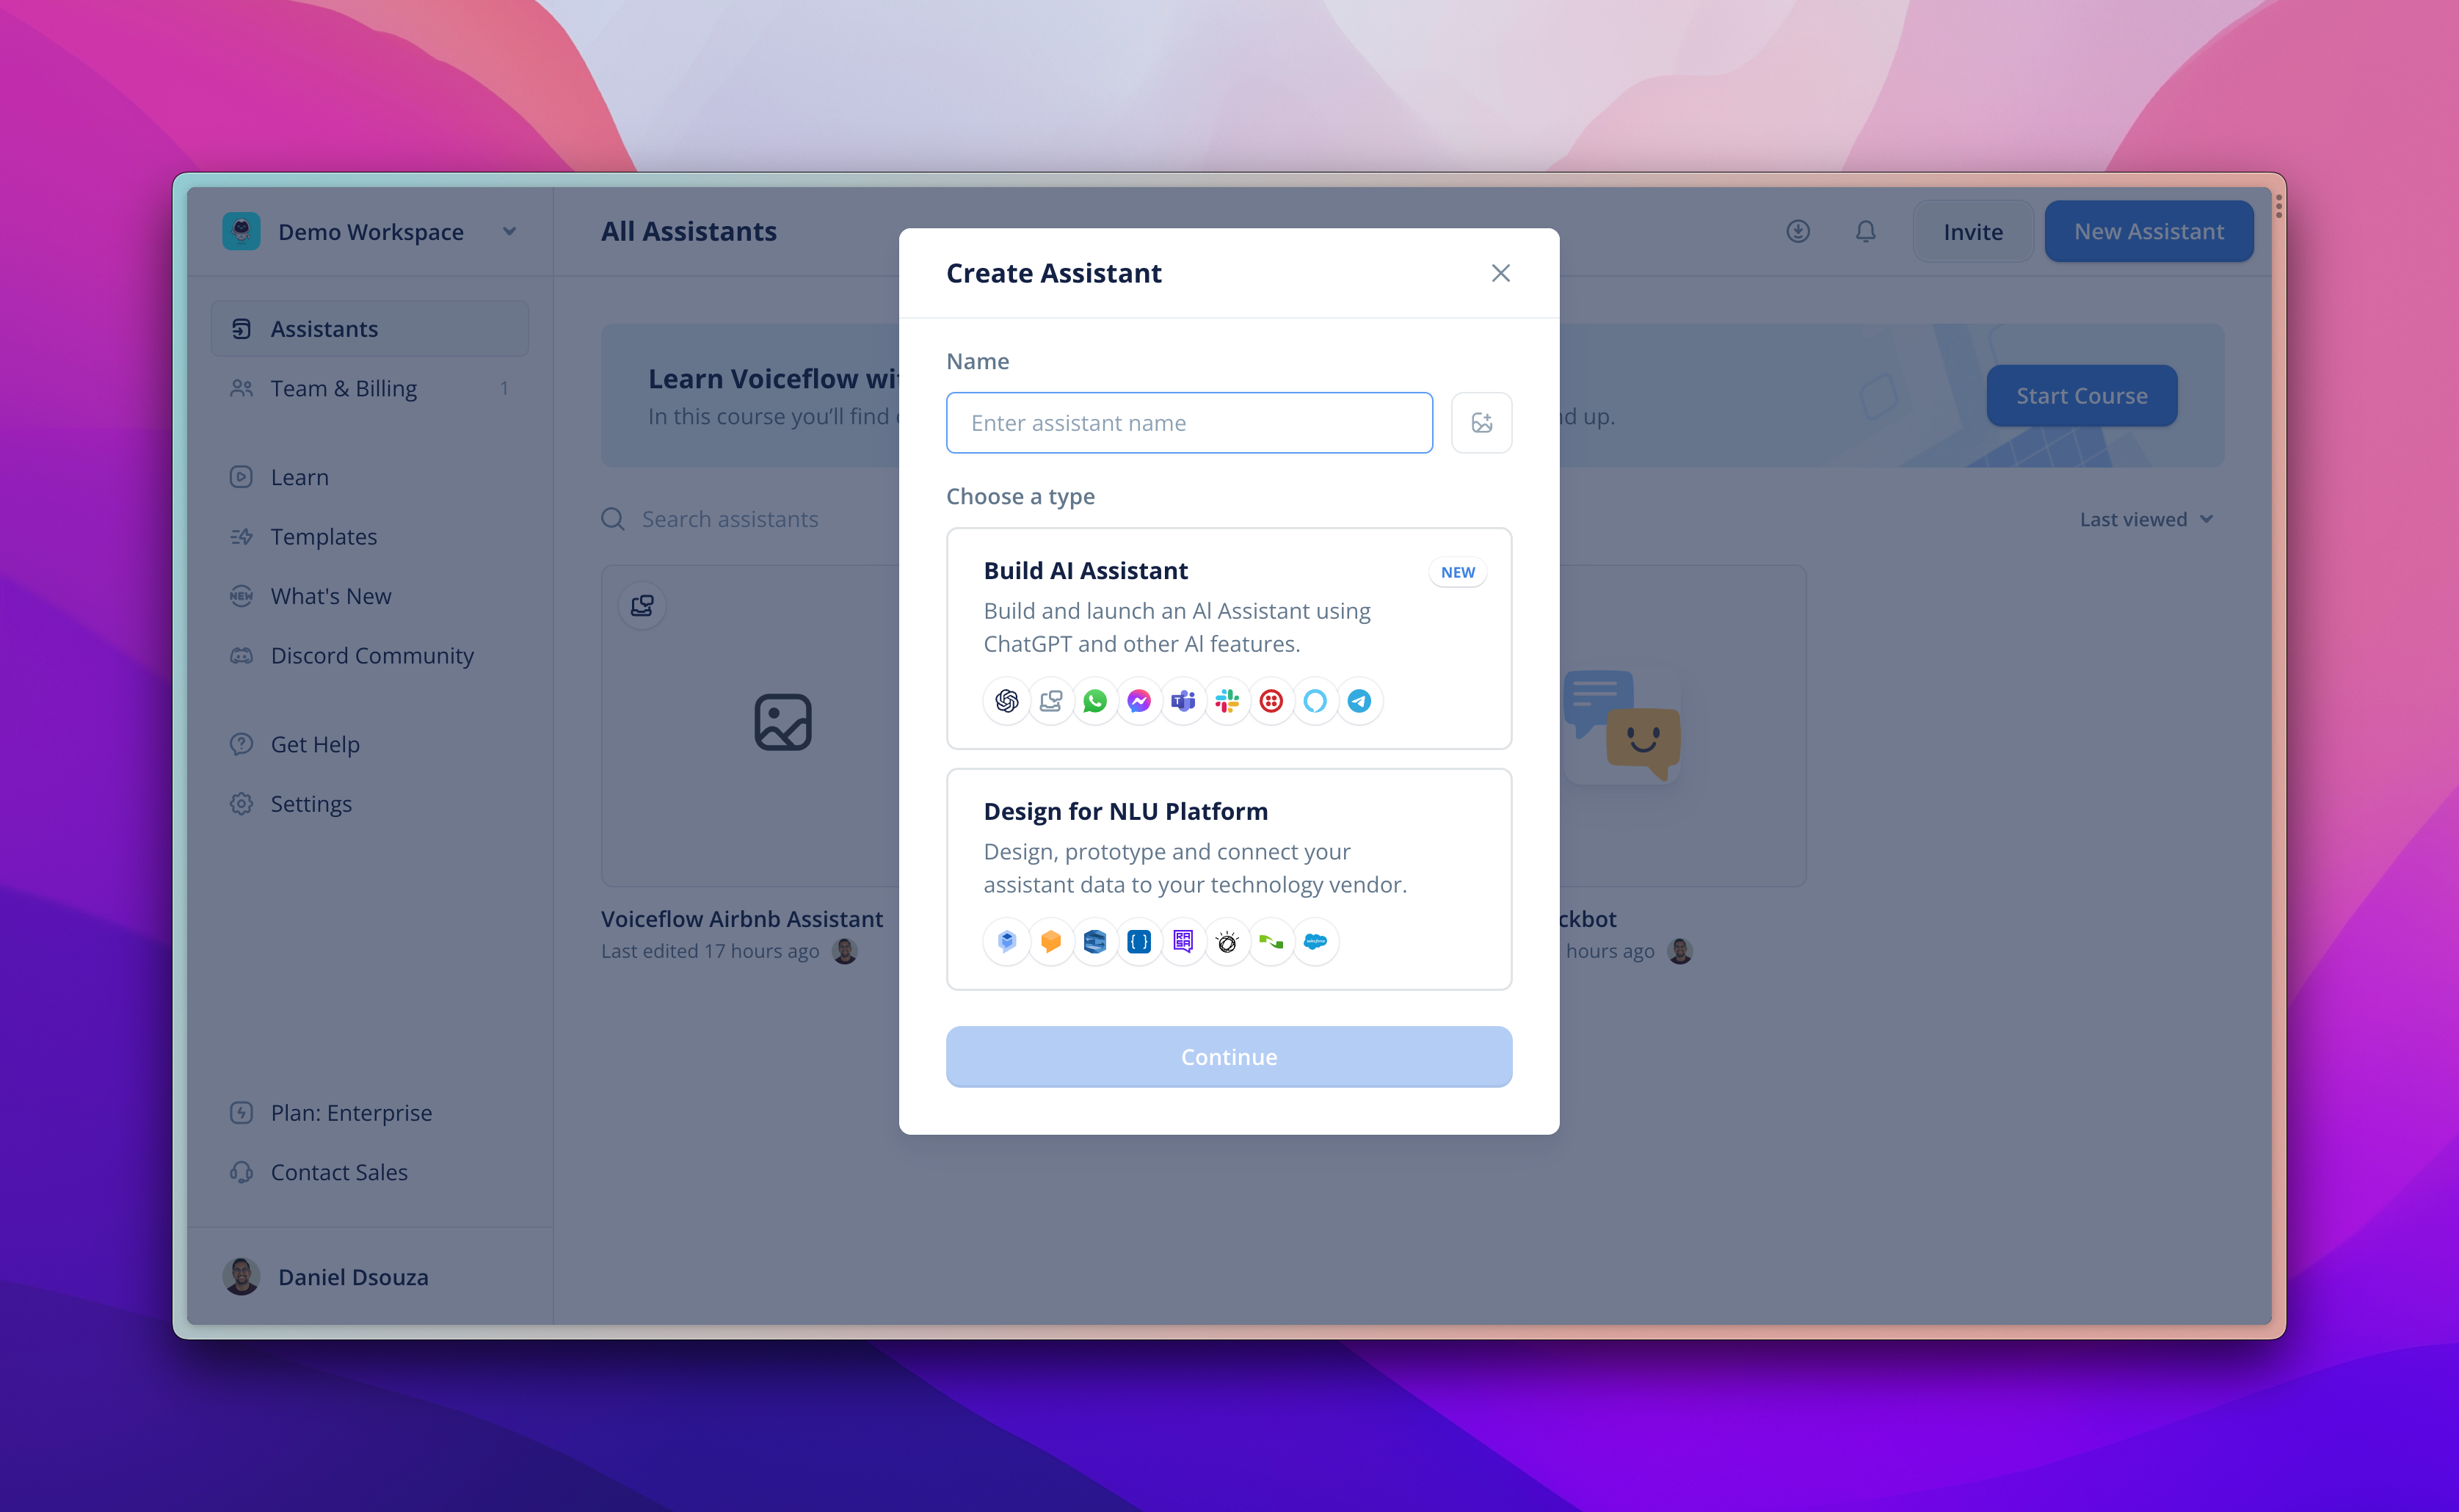
In your workspace click the 'New Assistant' button on the top right. From there you can choose whether to build an AI Assistant or Design for an NLU Platform.
- AI Assistant: If you are deploying to a channel directly with our API, or want to use AI features in your assistant use this.
- Designing for NLU Platform: If you are working with an existing NLU platform (ie. Dialogflow, Lex, Rasa) and using Voiceflow just for design and export. Use this.
This walkthrough will focus on building and deploying an AI Assistant. If you are designing for an NLU platform. Visit our guide to building for export here.
Whats Next?
- Add Data: Using our knowledge base feature. You can upload any set of PDFs, Webpages, or Text files to power your assistant instantly.
- Preview: Preview what your assistant will look like
- Deploy: Use our API or Integrations to deploy to a website within minutes.
Updated 5 months ago